**** Discover expert tips and tricks for how to dehumidify a basement creating a dry and healthy space.**** Uncategorized Articles - Page 17 of 24 - POM Plumbing Blog

How To Dehumidify Your Basement

Is your basement feeling damp and musty? Are you noticing signs of excessive humidity? Worry not, for we have the ultimate guide on how to dehumidify your basement effectively. A dry and comfortable basement not only prevents mold and mildew but also provides additional living space. In this article, we’ll explore the main signs that indicate your basement needs dehumidification and the best methods to achieve a dry and comfortable environment.

What are the Main Signs That Your Basement Needs to be Drained?

Before we jump into the solutions how to dehumidify a basement it’s crucial to recognize the signs that your basement’s humidity levels are out of control. Here are the main signs that indicate your basement needs to be dehumidified:

  • Musty Odors: A distinct, musty smell often indicates the presence of mold or mildew, which thrive in humid environments.
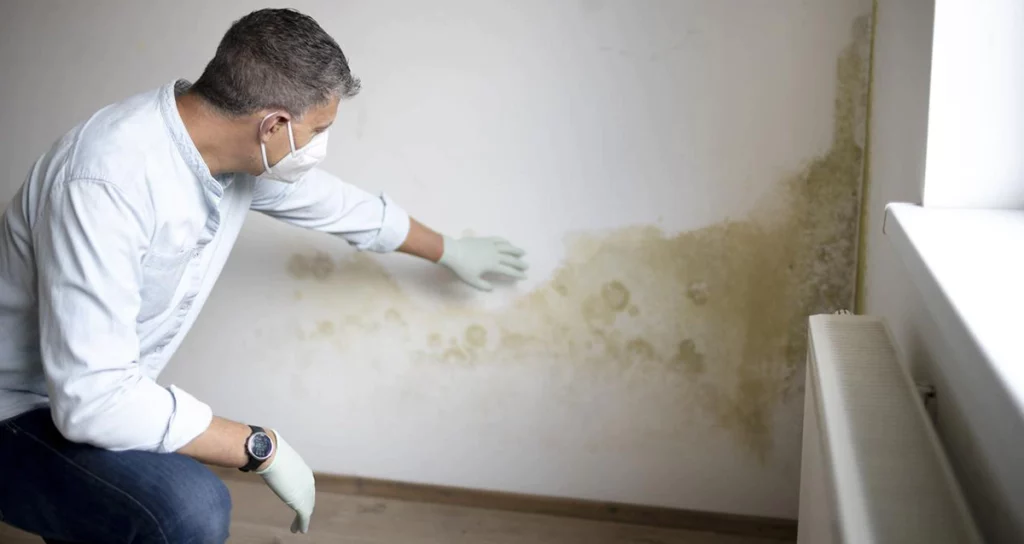
  • Visible Mold Growth: If you spot mold patches on walls, floors, or belongings, it’s a clear indication of high humidity levels.
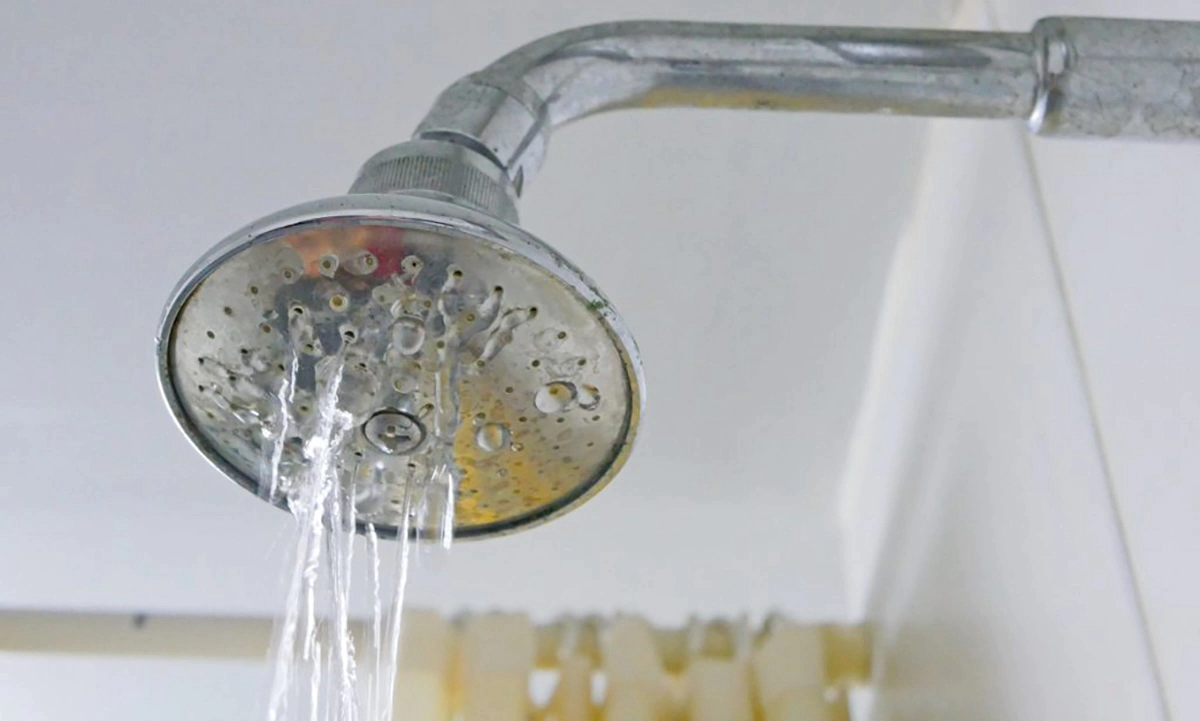
  • Condensation: Beads of water forming on windows, pipes, or surfaces are a sign of excessive moisture in the air.
  • Warped Wood: Wooden furniture or structures that appear warped or swollen are indicative of prolonged exposure to humidity.
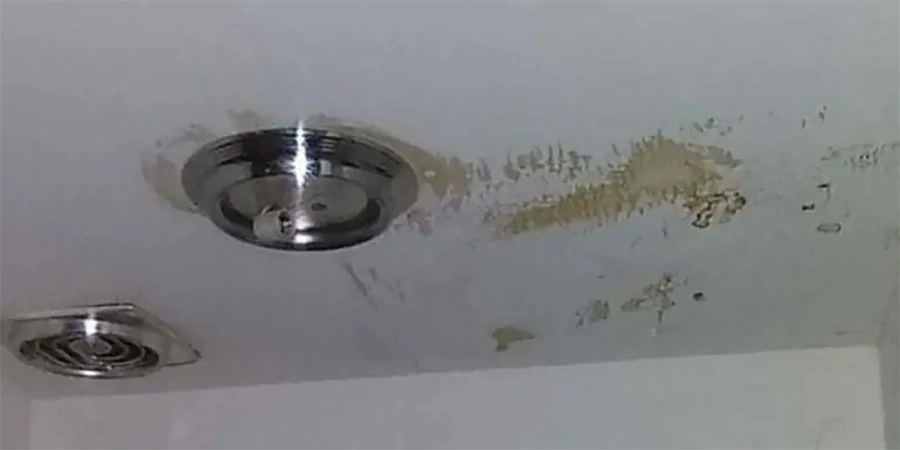
  • Peeling Paint or Wallpaper: Moisture can cause paint and wallpaper to peel or bubble, leading to an unsightly appearance.
  • Allergies and Respiratory Issues: Excessive humidity can worsen allergies and respiratory problems due to the growth of allergens like mold and dust mites.

What is the Best Way to Dehumidify the Basement?

When it comes to dehumidifying your basement effectively, a combination of proactive measures can make a significant difference in reducing excess moisture and creating a more comfortable environment. Let’s delve into the best methods to achieve a dry and comfortable basement environment:

Ensure Ventilation of the Basement

Proper ventilation is a fundamental step in controlling humidity levels. Regularly open windows and doors to allow fresh air circulation, especially during periods of low humidity. If your basement lacks natural ventilation, consider using exhaust fans or installing vents to facilitate air movement.

Keep the Basement Warm Even During Winter

Cold air is less capable of holding moisture, which can lead to condensation in your basement. Maintain a consistent temperature in your basement, even during the colder months. Using space heaters or incorporating your basement into your home’s heating system can help prevent temperature fluctuations that contribute to excess humidity.

Sealing Basement Cracks and Openings

Tiny cracks and gaps in your basement’s walls, floors, and foundation can serve as entry points for moisture. Regularly inspect and seal these openings using appropriate materials such as caulk or weatherstripping. By preventing water infiltration, you’ll minimize the potential for excess humidity.

Properly Insulating Walls and Floors

Adequate insulation not only helps regulate temperature but also prevents condensation on surfaces. Insulate walls, floors, and pipes using insulation materials suited for your basement’s specific needs. Proper insulation reduces the likelihood of moisture buildup on cold surfaces.

Cleaning Air Filters

Regularly clean and replace air filters to ensure optimal air circulation and filtration. Clean filters not only promote better air quality but also help reduce excess moisture in the air.

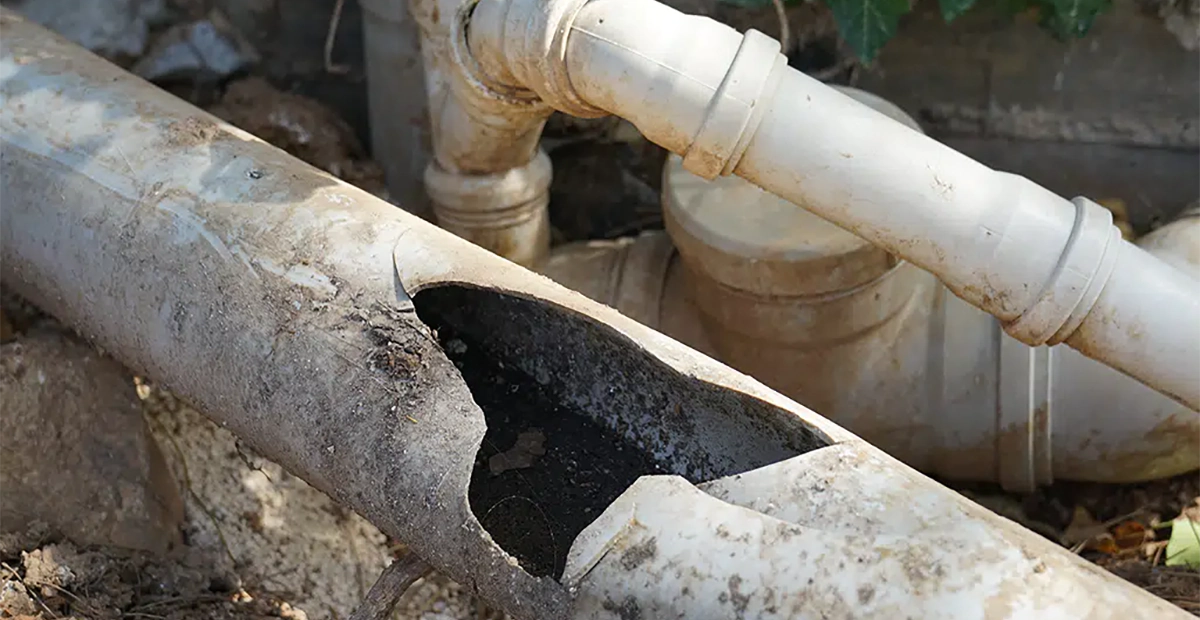
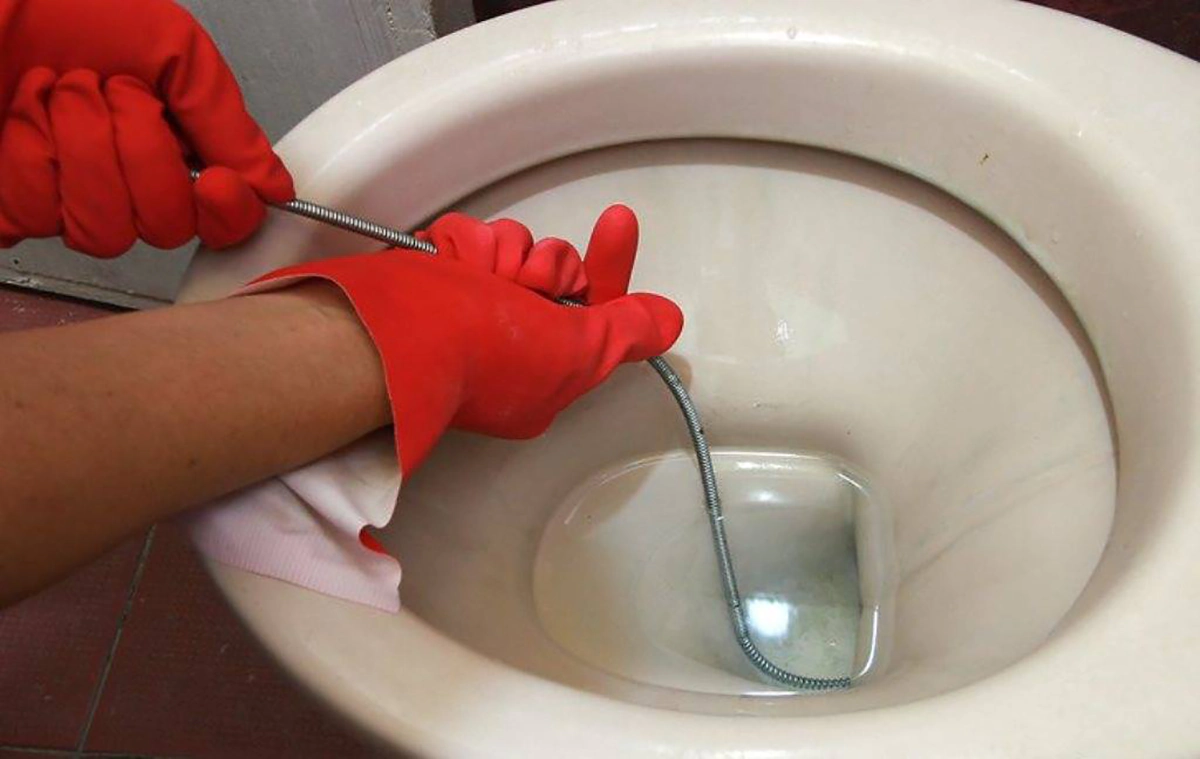
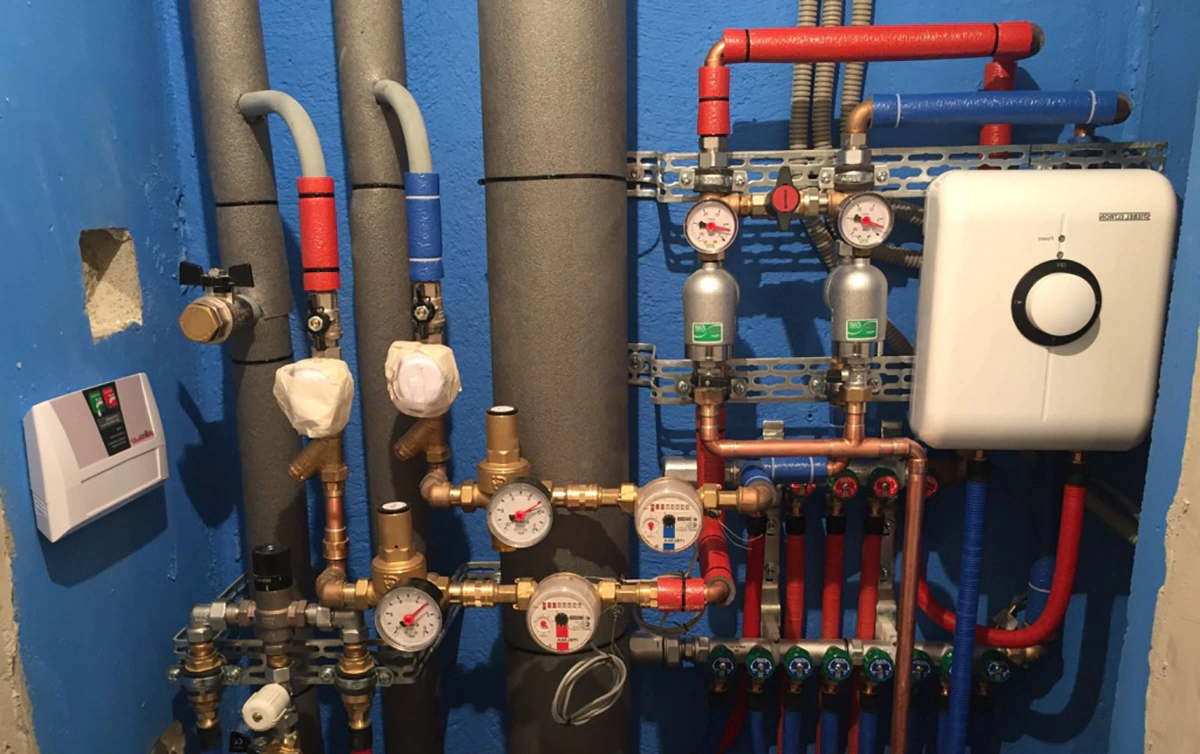
Inspecting and Cleaning Drain Lines

Blocked or clogged drain lines can contribute to excess moisture. Regularly inspect and clean these lines to ensure proper drainage and prevent water accumulation in your basement.

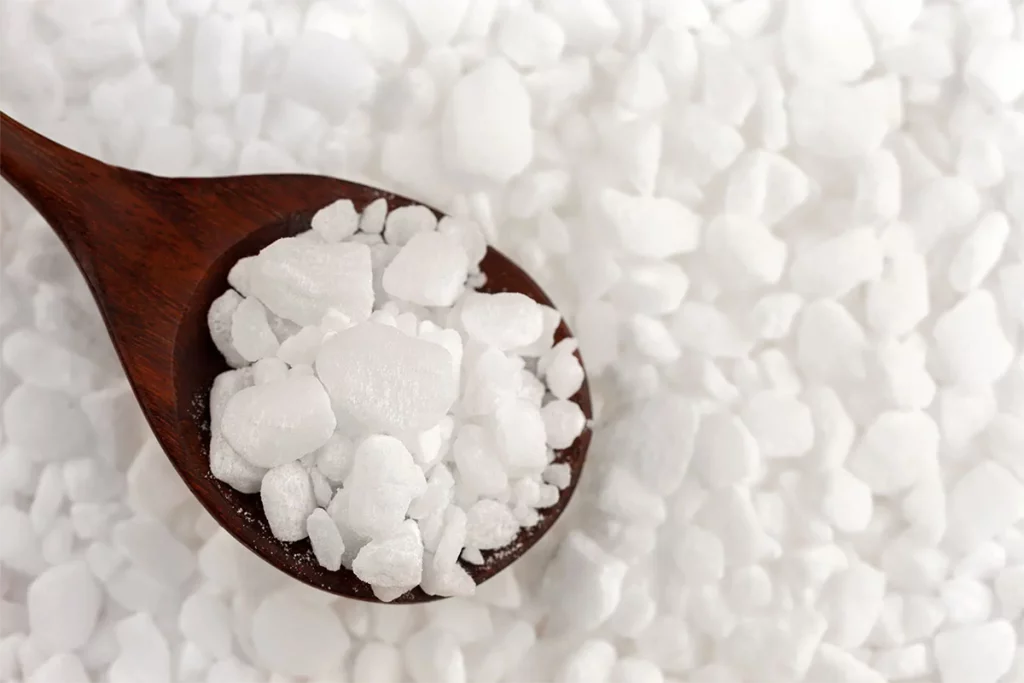
Use a Natural Dehumidifier: Charcoal Briquettes and Rock Salt

Charcoal briquettes and rock salt are natural dehumidifiers that can help absorb excess moisture from the air. Place bowls of charcoal briquettes or containers filled with rock salt in your basement. These materials have the ability to naturally absorb humidity, contributing to a drier environment.

Rethink Storage in the Basement

Consider elevating your belongings off the floor and using shelves or pallets to keep items away from potential moisture. Proper storage organization can significantly impact basement humidity. Cluttered and poorly organized storage can restrict airflow, leading to pockets of stagnant air. By rethinking how you store items in the basement, you can promote better ventilation and reduce humidity. 

Install a Ceiling Fan

Installing a ceiling fan in your basement can improve air circulation, which is essential for effective dehumidification. The increased airflow helps in distributing air evenly throughout the space, discouraging the buildup of moisture and mold.

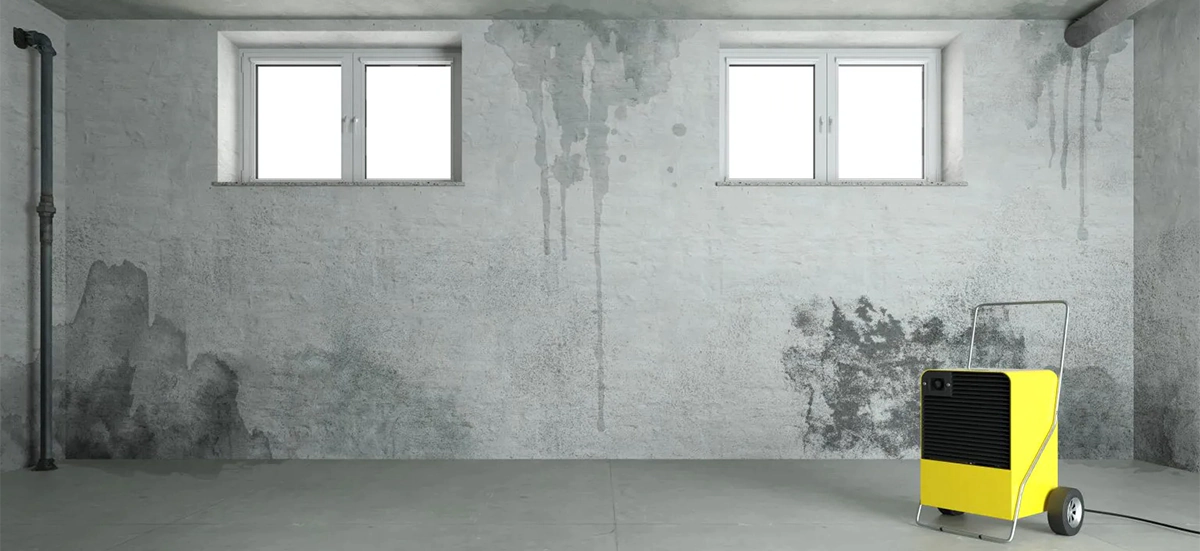
Install a Dehumidifier

One of the most efficient ways to dehumidify a basement is by using a dedicated dehumidifier. These appliances are designed to extract moisture from the air, maintaining optimal humidity levels. Depending on the size of your basement, you can choose from various capacities of dehumidifiers to suit your needs.

Dehumidifying your basement requires a combination of strategies to effectively control moisture levels. By inspecting and cleaning drain lines, using natural dehumidifiers, reorganizing storage, installing a ceiling fan, and utilizing a dehumidifier, you can create a more comfortable and healthier living space in your basement.

How Long to Dehumidify a Basement?

The time it takes to dehumidify a basement varies based on several factors, including the size of the basement, current humidity levels, and the effectiveness of the dehumidification methods employed. Generally, noticeable improvements can be observed within a few days to a week of implementing dehumidification measures. However, achieving optimal humidity levels may take a few weeks or more, depending on the severity of the issue.

In conclusion, transforming your basement from a damp and uncomfortable space into a dry, inviting area is achievable by following these comprehensive dehumidification steps. By recognizing the signs of high humidity, ensuring proper ventilation, utilizing natural dehumidifiers, and considering advanced solutions like dehumidifiers, you’ll create a basement that’s free from moisture-related issues. Remember, a dry basement is not only more pleasant to spend time in but also helps safeguard your home’s structural integrity. Don’t let humidity hold your basement back—take action today!

FAQ about How to drain a basement

Can I use a regular air conditioner as a dehumidifier?

While air conditioners can help reduce humidity, they are not as effective as dedicated dehumidifiers. Dehumidifiers are designed specifically to remove moisture from the air, whereas air conditioners primarily focus on cooling.

What humidity level should I aim for in my basement?

Aiming for a humidity level between 30% and 50% is generally recommended for basements. This range helps prevent mold growth and maintains a comfortable environment.

How often should I clean the dehumidifier’s filters?

It’s advisable to clean or replace the filters every two to three months, depending on the frequency of use and the manufacturer’s recommendations.

Are there any natural ways to dehumidify a basement?

Yes, natural methods include using items like charcoal briquettes and rock salt to absorb moisture from the air. However, these methods might not be as effective as mechanical dehumidifiers.

Should I run the dehumidifier all year-round?

Running the dehumidifier all year-round depends on your climate and basement conditions. In humid areas, it’s common to use it consistently, but in drier climates, you might only need it during humid seasons.

What Are the Symptoms of a Broken Sewer Line?

A functioning sewer line is essential for the proper functioning of your home’s plumbing system. However, over time, sewer lines can deteriorate due to various factors, leading to a range of issues that can cause inconvenience and potential health hazards. Recognizing the signs of a broken sewer line is crucial to addressing the problem promptly and preventing further damage. In this comprehensive article, we will explore the common broken sewer line symptoms and discuss the necessary steps for repair and replacement.

What Causes a Sewer Line to Break?

A broken sewer line doesn’t happen overnight. Understanding what leads to a damaged sewer line can help you prevent major plumbing issues and costly repairs. Here are the most common causes of a broken sewer pipe:

  • Tree Root Infiltration
    Roots from trees and shrubs naturally seek moisture, and your underground sewer pipes provide a perfect source. Over time, roots can penetrate tiny cracks in the pipe and expand inside, blocking or breaking the line.
  • Aging and Deterioration
    Many older homes still rely on clay, cast iron, or Orangeburg pipes. These materials degrade over time, becoming brittle and more prone to cracks or collapse. A broken sewer is often the result of decades of wear and tear.
  • Shifting Soil and Ground Movement
    Natural settling, soil erosion, or nearby construction can cause the ground to shift. This pressure may crack, dislodge, or break the sewer line, especially if it’s already weakened.
  • Extreme Temperature Changes
    Sudden freezing and thawing cycles can put stress on underground pipes. In colder climates, frozen wastewater can expand and cause the pipe to burst.
  • Poor Installation or Design
    If your sewer line was not installed with the proper slope or secure joints, it’s more vulnerable to sagging (called a “belly”) and eventual breakage.
  • Heavy Surface Loads
    Parking heavy vehicles or installing structures like patios directly above sewer lines can compress the soil and damage the pipe beneath.

Recognizing the underlying cause is just as important as spotting the symptoms. A professional plumber can inspect the line and recommend the best solution—whether it’s repair or full replacement.

How to Know If Your Sewer Line Is Broken: At-Home Tests

Wondering how to know if your sewer line is broken without calling a plumber right away? While professional inspections provide the most accurate diagnosis, there are a few simple tests and observations you can try at home to detect early signs of a broken sewer line or damaged sewer pipe:

  • Test Multiple Drains
    Flush toilets, run sinks, and drain tubs one after another. If more than one fixture shows signs of slow drainage or bubbling, it’s a likely indicator of a sewer line issue, not just a local clog.
  • Dye Testing
    Add a few drops of food coloring to a toilet bowl and flush. If you notice colored water or wet patches in your yard or near the foundation within 30–60 minutes, it could be leaking from a cracked or broken sewer line.
  • Smell Check
    Step outside and walk near the sewer cleanout or along the line’s path. A strong sewage smell outdoors—especially on dry days—can signal a break in the line below.
  • Observe Lawn Conditions
    Are parts of your yard unusually green, soggy, or sunken compared to others? These can be signs of a damaged sewer line leaking nutrients and moisture underground.
  • Listen for Gurgling Noises
    Strange gurgling or bubbling sounds in your drains after flushing or using water suggest trapped air—a symptom of a partially blocked or broken sewer pipe.

While these DIY checks can help identify red flags, they are not substitutes for a licensed inspection. If you notice multiple warning signs, it’s time to call a plumber for a camera inspection or further testing.

Signs Your Sewer Line is Broken

Detecting a broken sewer line early is essential to prevent further damage and costly repairs. If you’re wondering how do you know if your sewer line is broken, there are several telltale signs to watch out for:

There are Moldy Areas on the Walls and Floors

One of the most noticeable signs of a broken sewer line is the presence of mold and mildew on your walls and floors. The excess moisture escaping from the sewer line can create a conducive environment for mold growth. If you notice damp or moldy patches, especially in areas near plumbing fixtures, it’s a strong indication of a sewer line issue.

signs of broken sewer pipe

Slow Drains

Slow drainage in sinks, tubs, and toilets is a common symptom of a broken sewer line. When a sewer line is compromised, water and waste materials cannot flow freely, leading to sluggish draining. If you’re experiencing slow drains in multiple areas of your home, it’s time to investigate the health of your sewer line.

Weird Smell

A distinctive, foul odor resembling sewage is a clear sign that your sewer line might be broken. This broken sewer line smell is often most noticeable in the vicinity of drains and can be particularly unpleasant. If you detect an unusual smell in your home or yard, it’s essential to consider the possibility of a sewer line issue.

Crawlers and Critters

Broken sewer lines can attract pests and critters due to the presence of waste materials. Rats, roaches, and other pests are drawn to the damp and unhygienic environment created by a compromised sewer line. If you notice an increase in pest activity around your property, it’s worth investigating the status of your sewer line.

Sinking Concrete Slabs

If your property has concrete pathways or slabs, a broken sewer line beneath them can lead to sinking or uneven surfaces. The wastewater escaping from the damaged line can erode the soil, causing structural issues in your outdoor spaces.

Cracks in Your Foundation

A broken sewer line can contribute to soil erosion around your home’s foundation, leading to cracks in the foundation itself. These cracks can affect the stability and structural integrity of your house. If you observe any cracks in your foundation walls, it’s advisable to consider a sewer line inspection.

Is a Broken Sewer Pipe an Emergency?

Yes — in most cases, a broken sewer pipe is considered a plumbing emergency. Even if the issue seems minor at first, ignoring it can quickly lead to serious health, safety, and structural consequences. Here’s why you should treat signs of a broken sewer pipe with urgency:

  • Health Hazards
    A broken sewer pipe can release raw sewage into your home or yard. This creates a serious biohazard, exposing you and your family to harmful bacteria, viruses, and parasites.
  • Water Damage and Mold
    Sewage leaks often go unnoticed behind walls or under flooring. Over time, this moisture promotes mold growth and damages wood, drywall, and insulation — adding costly remediation on top of plumbing repairs.
  • Foundation Risks
    A leaking or damaged sewer line beneath your home can erode the surrounding soil, weakening your foundation. If left untreated, this could cause cracks, shifting, or sinking.
  • Pest Infestation
    A broken pipe provides the perfect environment for rats, insects, and other pests to enter your home through drain lines or access points in the yard.
  • Code Violations and Liability
    In many cities, untreated sewer line issues can violate local health or building codes. You may also be held responsible for damage to shared sewer systems or neighboring properties.

While not all symptoms mean immediate disaster, it’s always better to act fast. If you suspect a break — especially if you smell sewage, see yard flooding, or hear drain gurgling — contact a licensed plumber right away. Quick action can reduce repair costs and protect your home from long-term damage.

Sewer Line Repair and Replacement

When you’ve identified the symptoms of a broken sewer line, it’s essential to take action promptly to avoid worsening the situation. Depending on the extent of the damage, you may need to consider either repair or replacement options. Here’s what you need to know:

 broken sewer line symptoms
  1. Patch Repairs: For minor cracks or localized damage, patch repairs can be a suitable solution. Plumbers can use specialized materials to seal the affected area, preventing leaks and restoring the integrity of the sewer line.
  2. Hydro Jetting: Hydro jetting involves using a high-pressure stream of water to clear out debris, blockages, and buildup within the sewer line. This method can help improve the flow and function of the line without the need for extensive excavation.
  3. Pipe Lining: Pipelining, also known as trenchless repair, is a non-invasive method that involves inserting a resin-coated liner into the damaged pipe. Once in place, the liner hardens and creates a new, structurally sound inner lining within the existing pipe.

Repairing a broken sewer line involves fixing specific sections or patching up minor cracks. Replacement, on the other hand, entails removing the old sewer line and installing a new one. It’s crucial to consult with a professional plumber to assess the situation accurately and determine the best course of action.

In conclusion, recognizing the symptoms of a broken sewer line is vital for maintaining the functionality and hygiene of your home. If you experience any of the mentioned signs, it’s recommended to seek professional assistance to address the issue promptly and effectively. Regular maintenance and timely repairs can help prevent extensive damage and ensure the smooth operation of your plumbing system.

FAQ about the symptoms of a broken sewer line

What are the early signs of a sewer line issue?

Early signs of a sewer line issue include slow drains, gurgling noises, and sewage odors in your home.

Can I ignore minor sewer lines broken, or do they require immediate attention?

Minor sewer line issues shouldn’t be ignored, as they can worsen over time and potentially lead to more extensive damage.

What should I do if I suspect a sewer line problem but I’m not sure?

If you’re unsure about a sewer line problem, it’s wise to contact a professional plumber for a thorough inspection and accurate diagnosis.

How long can I wait to fix a broken sewer line?

Delaying repairs on a broken sewer pipe can lead to worsening damage, including foundation issues, mold, and exposure to raw sewage. It’s best to schedule an inspection as soon as you notice symptoms.

What does a broken sewer line smell like?

The most common symptom is a strong sewage odor coming from drains, your yard, or basement. This smell is often one of the first and most obvious signs that your sewer line is broken.

What is the Difference Between Low Flow and Regular Flow Toilets?

In the world of plumbing and water conservation, toilets play a crucial role. Over the years, toilet technology has evolved significantly to address environmental concerns and save water. Two main types of toilets that have gained prominence are low flow toilets and regular flow toilets. Both aim to balance the necessity of hygiene with the imperative to conserve water. In this article, we will delve into the distinctions between these two types of toilets, exploring their features, advantages, disadvantages, and how they differ from each other.

What is a Low Flow Toilet?

Low flow toilets, also known as high-efficiency toilets, are designed to use significantly less water per flush compared to their conventional counterparts. These toilets utilize innovative flushing mechanisms, such as pressure-assisted or dual-flush systems, to effectively remove waste with reduced water consumption. The primary goal of low flow toilets is to address water scarcity issues and promote sustainable water usage.

Advantages and Disadvantages

When considering the differences between low flow toilets vs regular toilets, it’s essential to weigh their respective advantages and disadvantages.

Benefits of Low Flow Toilets

  • Water Conservation: One of the standout advantages of low flow toilets is their ability to conserve water. They use significantly less water per flush, contributing to sustainable water usage and lower water bills.
  • Environmental Impact: Choosing a low flow toilet helps reduce water wastage and minimizes your overall ecological footprint, promoting a greener lifestyle.
  • Long-Term Savings: While the initial cost of a low flow toilet might be slightly higher, the long-term savings on water bills can outweigh the upfront investment.

Disadvantages of Low Flow Toilets

  • Higher Initial Cost: Low flow toilets often come with a higher price tag due to their advanced technology and water-saving features.
  • Potential Clogging: In some cases, the reduced water flow can lead to more frequent clogs, requiring extra maintenance and care.
  • Adjustment Period: Users might need time to adapt to the unique flushing mechanism of low flow toilets, as it differs from traditional models.

What is a Regular Flow Toilet?

On the other side of the spectrum, regular flow toilets, also referred to as standard toilets, have been a staple in bathrooms for decades. These toilets have a more conventional design and are known for their robust flushing power.

Pros of Regular Flow Toilets

  • Familiarity: Regular flow toilets have a well-established design and functionality, making them a familiar choice for many households.
  • Lower Initial Cost: Compared to low flow toilets, regular flow toilets often have a more affordable upfront cost.
  • Effective Waste Removal: The strong flush of regular flow toilets ensures efficient waste removal with each use.

Cons of Regular Flow Toilets

  • Higher Water Consumption: Regular flow toilets use a larger volume of water per flush, leading to potential water wastage over time.
  • Environmental Concerns: Due to their higher water consumption, regular flow toilets are less eco-friendly and contribute to excessive water usage.

How Low Flow Toilets Differ from Regular Ones

Low flow toilets and regular flow toilets exhibit distinct differences in various aspects, each contributing to their unique performance and impact on water usage.

Bowl Differences

  • Low Flow Toilets: Low flow toilets often feature redesigned bowls and trapways. These adaptations are aimed at enhancing waste removal efficiency while utilizing reduced water volume. The modified bowl design facilitates effective flushing while using less water per flush, aligning with the water-saving goals of these toilets.
  • Regular Flow Toilets: In contrast, regular flow toilets might have larger bowl sizes and more conventional bowl designs. The focus here tends to be on established functionality rather than the advanced water-saving features found in low flow models.

Flushing Power

  • Regular Flow Toilets: Regular flow toilets are characterized by their robust flushing power. The higher water volume used in each flush results in a forceful expulsion of waste, ensuring thorough cleaning of the bowl.
  • Low Flow Toilets: Low flow toilets rely on innovative flushing mechanisms to achieve efficient waste removal with less water. While their flush might not be as forceful as that of regular flow toilets, they maintain adequate flushing performance while minimizing water consumption.

Toilet Tank

  • Low Flow Toilets: One of the noticeable distinctions lies in the size of the toilet tank. Low flow toilets typically feature smaller tanks, reducing the amount of water required to refill the tank after each flush. This design contributes to the overall water-saving strategy of these toilets.
  • Regular Flow Toilets: Regular flow toilets often come with larger tanks to accommodate the higher water volume needed for a forceful flush. While this design contributes to effective waste removal, it also leads to increased water consumption.

Water Line Differences

  • Low Flow Toilets: Low flow toilets feature smaller water lines, which contribute to their overall water-efficient design. The reduced water line size aligns with the goal of using less water throughout the toilet’s operation.
  • Regular Flow Toilets: Regular flow toilets typically have larger water lines, reflecting the greater water volume required for their flushing mechanism. This design choice is intended to ensure consistent and powerful waste removal.

In conclusion, the choice between low flow toilets vs regular toilets depends on individual preferences, environmental considerations, and budget constraints. While low flow toilets excel in water conservation and environmental responsibility, regular flow toilets maintain their popularity due to their established design and lower upfront costs. Understanding the distinctions and unique features of these two types of toilets empowers homeowners to make informed decisions that align with their values and needs.

FAQ about the difference between low and regular flow toilets

Are low flow toilets more prone to clogging?

Low flow toilets might be slightly more prone to clogging due to their reduced water volume per flush, but using them correctly and avoiding flushing non-flushable items can minimize this issue.

Do low flow toilets require special maintenance compared to regular toilets?

Low flow toilets don’t necessarily require special maintenance, but users might need to be more mindful of what they flush to prevent clogs. Regular cleaning and proper usage are key for both types.

How much water can I save by using a low flow toilet?

By using a low flow toilet, you can save around 25-60% of water per flush compared to traditional toilets, contributing to significant water conservation over time.

5 Low Water Pressure Solutions: Troubleshooting and Preventive Measures

If you’ve ever experienced the frustration of weak water pressure while taking a shower or trying to wash dishes, you know how important it is to have a consistent and strong water flow. Low water pressure can be a bothersome issue, but fear not – there are effective solutions to tackle this problem. In this article, we’ll delve into the root causes of low water pressure, highlight the significance of adequate water flow, and provide you with practical solutions troubleshooting low water pressure in house.

What Causes Low Water Pressure

Low water pressure can be attributed to various factors, which include both external and internal issues. These can include issues with the municipal water supply, faulty plumbing installations, or internal problems within your home. Some common culprits include:

  • Pipe Corrosion: Over time, pipes can corrode or develop mineral deposits, restricting water flow.
  • Blockages: Debris, sediment, or mineral buildup can clog pipes, reducing water pressure.
  • Faulty Pressure Regulator: A malfunctioning pressure regulator can lead to inconsistent water pressure. This component is responsible for maintaining a steady flow of water throughout your plumbing system.
  • Faucet Aerators: Clogged or damaged faucet aerators can hinder water flow.
  • Supply Valve Problems: Faulty water supply valves may not allow sufficient water into your home’s plumbing system.

Importance of Adequate Water Flow

Adequate water flow is essential for various household activities, from showering and dishwashing to laundry and gardening. Insufficient water pressure can lead to frustration and inefficiency in these tasks, disrupting your daily routine.

Solutions for Low Water Pressure

From quick and easy fixes that you can implement yourself to more intricate adjustments that might require professional assistance, these solutions address various underlying causes of low water pressure. 

Checking Water Supply Valves

Start by ensuring that the water supply valves leading to your home are fully open. Sometimes, valves may inadvertently be partially closed, affecting water flow. Turn them fully counterclockwise to allow maximum water supply.

Clearing Blockages in Pipes

If blockages are suspected, it’s time to address them. Turn off the water supply, and using a plumber’s snake or a pipe-cleaning solution, clear out any debris or mineral buildup that might be obstructing water flow.

Pressure Regulator Adjustment

Inspect your pressure regulator and adjust it if necessary. A faulty regulator can result in inconsistent pressure. Consult your user manual or consider seeking professional assistance to ensure the regulator is set correctly.

Fixing Faucet Aerators

Clean or replace clogged or damaged faucet aerators. These small attachments at the end of faucets can accumulate sediment and affect water pressure. Simply unscrew the aerator, clean it thoroughly, and reattach it.

Clean or Replace Corroded Plumbing

For pipes suffering from corrosion or mineral deposits, consider professional plumbing services to clean or replace the affected sections. This can significantly improve water flow and pressure.

Preventive Measures to Maintain Consistent Water Flow

Prevention is often the key to avoiding future episodes of low water pressure. By implementing these proactive measures, you can ensure that your plumbing system remains in optimal condition, providing you with a steady and reliable water flow for years to come.

  • Regular Maintenance: Schedule periodic inspections of your plumbing infrastructure. Identifying and addressing potential issues early can prevent them from escalating into major problems that affect water pressure. Regular maintenance also involves checking for leaks, corrosion, and any signs of blockages.
  • Water Softening: If your area has hard water – water with a high mineral content – consider installing a water softener. Hard water can lead to mineral deposits accumulating in your pipes over time, reducing water flow. A water softener will help prevent these deposits and maintain unrestricted water movement.
  • Flushing the System: Periodically flush your plumbing system to clear out sediment, debris, and mineral buildup that may accumulate in the pipes. Flushing can significantly enhance water flow and prevent potential blockages.
  • Professional Inspection: Enlist the services of a professional plumber for a thorough inspection of your plumbing system. A professional can identify potential problems, offer expert recommendations, and perform necessary maintenance tasks that might be beyond your expertise.
  • Updating Fixtures: Outdated fixtures, such as faucets and showerheads, might not be designed for optimal water efficiency. Consider updating to newer, water-efficient fixtures that maintain water pressure while conserving water usage.

Conclusion

Dealing with low water pressure can be frustrating, but understanding the causes and implementing effective solutions can bring back the consistent water flow you need for your daily activities. From addressing blockages and faulty regulators to preventive measures, there’s a solution for every situation. By taking proactive steps, you can ensure that your home’s water pressure remains reliable and efficient.

FAQ about low water pressure

Why is my water pressure low?

Low water pressure can result from factors like blockages in pipes, corroded plumbing, and faulty pressure regulators.

What are some house low water pressure solutions?

House low water pressure solutions include clearing blockages, adjusting pressure regulators, fixing faucet aerators, and maintaining your plumbing system.

Can low water pressure be solely attributed to municipal supply issues?

No, low water pressure can result from various factors including pipe corrosion, blockages, and internal plumbing issues, not solely from municipal supply problems.

Are pressure-boosting systems suitable for all types of properties?

Pressure-boosting systems can be beneficial for properties with consistent low water pressure, but their suitability depends on factors like property size, plumbing layout, and water usage patterns.

How can I differentiate between a plumbing leak and low water pressure due to other factors?

If you observe a sudden decrease in water pressure along with damp spots, water stains, or water wastage, it might indicate a plumbing leak. Low pressure due to other factors often affects multiple fixtures.

Burst Pipes: What to Do and How to Prevent a Pipe Burst

A burst water pipe is a homeowner’s nightmare that can lead to significant property damage, expensive repairs, and disruption to daily life. In this comprehensive guide, we’ll explore the importance of addressing burst pipes promptly, delve into the causes of pipe bursts, highlight the signs that indicate a burst pipe, and provide actionable steps to prevent pipe bursts. Additionally, we’ll cover immediate actions to take in case of a pipe burst and the vital role of professional plumbers in resolving these situations.

The Significance of Addressing Burst Pipes Promptly

When it comes to burst pipes, swift action can make all the difference. The impact of a burst pipe extends beyond the immediate inconvenience of water leakage. From preventing extensive property damage to mitigating potential health hazards, understanding the urgency of addressing burst pipes can empower homeowners to take proactive steps and minimize the potential fallout of these unexpected events. 

Causes of Burst Pipes

Understanding the causes of burst pipes is crucial for implementing preventive measures:

  • Freezing Temperatures: During colder months, water inside pipes can freeze and expand, exerting pressure on pipe walls and causing them to burst. Insulating pipes and maintaining indoor heating can prevent freezing-related bursts.
  • Corrosion: Corroded pipes are weaker and more prone to bursting. Regular maintenance and timely replacement of old pipes can prevent corrosion-induced bursts.
  • Water Pressure Issues: Excessive water pressure can strain pipes, leading to burst pipes. Installing a pressure regulator helps control water pressure and prevents bursts caused by pressure issues.

Signs of a Burst Pipe

Detecting a burst pipe early is crucial in preventing extensive damage to your property. Burst pipes can lead to water leakage, structural instability, and mold growth, causing significant financial and emotional stress. By recognizing the signs of a burst pipe, you can take swift action to minimize the impact. Here are some key indicators to watch out for:

  • Water Stains and Damage: Discoloration, warping, or bubbling of paint or wallpaper on walls, ceilings, or floors may suggest a hidden burst pipe.
  • Reduced Water Pressure: A sudden drop in water pressure might indicate a pipe leak or burst, especially if the decrease is notable across multiple fixtures.
  • Unusual Sounds: Banging, clanging, hissing, or gurgling noises from pipes can signify trapped air due to a leak or burst.
  • Foul Odors: Musty or foul odors in specific areas could point to water stagnation resulting from a burst pipe.
  • Visible Water Puddles: The most obvious sign of a burst pipe is the presence of standing water or flooding in unexpected areas of your property.

How to Prevent Pipes Bursting

Preventing pipes from bursting requires a proactive approach that involves both preparation and regular maintenance. By implementing preventive measures, you can significantly reduce the risk of experiencing damage and inconvenience caused by burst pipes. Here’s what you can do:

Insulating Pipes for Cold Weather

As the temperature drops, the risk of pipes freezing and subsequently bursting increases. To protect your pipes during colder months, consider insulating them with foam sleeves or similar materials. This extra layer of insulation helps maintain a consistent temperature within the pipes, preventing the water inside from freezing and expanding. Focus on pipes located in unheated areas of your home, such as basements, crawl spaces, and attics. By properly insulating your pipes, you create a barrier that shields them from the harsh effects of cold weather.

Regular Maintenance Checks

Proactive maintenance is essential to identify potential issues before they escalate into major problems. During these inspections, the plumber will assess the condition of your pipes, valves, and fittings. Any signs of corrosion, wear, or weakening will be addressed promptly. Additionally, maintenance checks provide an opportunity to detect and fix small leaks before they lead to burst pipes. By investing in routine maintenance, you can catch problems early and extend the lifespan of your plumbing system.

Addressing Structural Damage

Structural issues within your property can exacerbate the risk of burst pipes. Cracks in walls, ceilings, or foundations can lead to increased pressure on pipes, making them more vulnerable to bursting. It’s essential to address any structural damage promptly. Consult with professionals who specialize in structural repairs to assess and fix issues that could impact your plumbing system. By ensuring the stability of your property’s structure, you reduce the likelihood of burst pipes caused by external factors.

Pipe Burst: Immediate Action Steps

In the unfortunate event of a burst pipe, immediate action is essential:

  1. Shutting off the Main Water Supply: Locate and turn off the main water supply to prevent further water damage.
  2. Ensuring Electrical Safety: Turn off electricity in affected areas to avoid potential electrical hazards.
  3. Safeguarding Valuable Possessions and Electronics: Move valuable items and electronics away from the affected area to prevent damage.

Call a Plumber

If you find yourself dealing with burst pipes, it’s essential to act quickly to minimize damage and prevent further issues. While immediate action helps, it’s essential to call a professional plumber to fix the burst pipe properly.

Contact Your Insurance Provider

Dealing with burst pipes can result in unexpected expenses due to property damage, water cleanup, and repair costs. To alleviate some of the financial burden, it’s important to contact your insurance provider as soon as possible. Review your homeowner’s insurance policy to understand what kind of coverage you have for water damage and burst pipes. Document the damage with photographs and detailed descriptions to provide evidence for your claim. 

Conclusion

Dealing with burst pipes requires swift action and preventive measures. By understanding the causes, signs, and preventive steps, homeowners can protect their properties and avoid extensive damage. In case of a burst pipe, quick actions such as shutting off the water supply and contacting a plumber can significantly mitigate the impact. Remember, a burst pipe situation is best handled by professionals to ensure a safe and effective solution.

FAQ about Burst Pipes

What causes pipes to burst?

Pipes can burst due to freezing temperatures, water pressure buildup, corrosion, or physical damage.

How can I quickly shut off the water supply?

Locate the main water shut-off valve in your home and turn it clockwise to stop the water flow.

Should I try fixing the burst pipe myself?

It’s recommended to call a professional plumber to ensure proper and safe repairs.

How can I prevent pipes from bursting again?

Insulate exposed pipes in cold weather, maintain moderate water pressure, and address any signs of corrosion or damage promptly.

What is a Backwater Valve and How Does It Work?

In the world of plumbing and drainage systems, a backwater valve plays a crucial role in preventing unwanted flooding and sewage backups. This device might sound technical, but its purpose is quite straightforward: to ensure that wastewater flows in the right direction and doesn’t cause havoc in your home. In this article, we’ll delve into the details of what a backwater valve is, how it functions, the various types available, the benefits of installing one, and the significance of regular maintenance.

What Is a Backwater Valve and How Does It Work?

In the world of plumbing and home protection, understanding what is a backwater valve is essential—especially for homeowners living in areas prone to flooding or heavy rainfall. Also known as a sewer backwater valve, this crucial device helps prevent the nightmare of sewage backing up into your home.

In this article, we’ll explore what is a sewer backwater valve, how it works, the types available, and why installing one is a smart long-term investment.

Protect Your Home from Sewer Backups

Wondering what is a sewer backwater valve and if you need one?
Our licensed plumbers can inspect your system and recommend the right solution to keep your basement dry and safe.

🚿 Contact POM Plumbing today to schedule your backwater valve consultation!

What Is a Sewer Backwater Valve?

So, what is a sewer backwater valve exactly?

It’s a mechanical device installed in your drainage system to stop wastewater from flowing back into your home when municipal sewers become overloaded. This often happens during heavy storms or rapid snowmelt. The backwater valve ensures wastewater can exit your property freely—but prevents anything from coming back in.

How Does a Backwater Valve Work?

The concept behind a backwater valve is simple: it allows wastewater to flow out of your home, but not back in.

  • Under normal conditions, the valve flap stays open to let water drain properly.
  • When backflow pressure occurs, such as during a sewer backup, the flap closes to block contaminated water from entering your basement or lower floors.

Key Components:

  • Flap or Gate: The movable barrier that opens and shuts based on water pressure.
  • Housing Unit: Sealed structure that supports and guides the flap mechanism.

Spring Assist (optional): Speeds up closure during emergencies for added protection.

Types of Backwater Valves

There are several types of backwater valves designed for residential and commercial use:

  • Check Valve: Uses a hinged flapper to block reverse flow—simple and widely used.
  • Gate Valve: Uses a vertical gate to block sewer backup more precisely.
  • Combination Valve: Merges both mechanisms for enhanced protection.

Why Should You Install a Backwater Valve?

Installing a backwater valve isn’t just a precaution—it’s a smart investment in your property’s safety:

  • ✅ Flood and Backup Prevention: Stops sewage from entering your home during storms.
  • ✅ Health Protection: Keeps bacteria and waste from contaminating your living space.
  • ✅ Property Value and Savings: Reduces potential cleanup and repair costs after floods.

 Install a Backwater Valve Before It’s Too Late

Don’t wait for the next storm to learn the hard way.
Now that you know what is a backwater valve, take action and protect your home from flooding and costly sewage backups.

📞 Call us now or book online — get expert installation with POM Plumbing!

Backwater Valve Maintenance Tips

Knowing what is a sewer backwater valve also means understanding the need for regular care:

  • Perform visual checks for damage or buildup.
  • Clean the flap and housing as part of seasonal maintenance.
  • Test the system occasionally by simulating flow in floor drains.

Final Thoughts

So, what is a backwater valve used for?

It’s your home’s frontline defense against sewer backups and basement flooding. This humble but powerful device gives you peace of mind by ensuring that dirty water only flows out—not in. If you live in a flood-prone zone or have a finished basement, a sewer backwater valve is more than helpful—it’s essential.

FAQ about the check valve and how it works?

Will a backwater valve increase my property value?

Installing a backwater valve can potentially enhance your property’s value by showcasing a proactive measure against water damage and flooding.

How often should I inspect and maintain my backwater valve?

Installing a backwater valve can potentially enhance your property’s value by showcasing a proactive measure against water damage and flooding.

Can I retrofit a backwater valve into an existing plumbing system?

Yes, retrofitting a backwater valve into an existing plumbing system is possible with the guidance of a professional plumber.

Are there any potential disadvantages to using a backwater valve?

While backwater valves are effective, they might require occasional maintenance and testing, and improper installation could hinder their performance.

What does a backwater valve do?

A backwater valve prevents sewage or wastewater from flowing back into your home during heavy rainfall or flooding. It ensures that water flows in one direction only, away from your property.

DIY Clogged Toilet Resolutions: How to Unclog It Yourself?

Dealing with a clogged toilet can be quite the hassle, but fear not – you don’t always need to call in the professionals. With a bit of DIY spirit and the right tools, you can often unclog a toilet on your own. In this guide, we’ll walk you through common causes of toilet clogs, the tools and supplies you’ll need, and various methods for DIY unclogging.

Here’s a helpful table outlining various DIY methods for resolving a clogged toilet, each with a brief description and steps to follow:

Method Description Steps
Plunger A tried and true method using manual suction to dislodge clogs.
  1. Insert the plunger into the toilet bowl and ensure a good seal. 
  2. Pump vigorously several times. 
  3. Check if the water drains properly.
Hot Water and Dish Soap Uses hot water and soap to lubricate and break down the clog.
  1. Add a few squirts of dish soap to the toilet bowl. 
  2. Pour in a bucket of hot water from waist height. 
  3. Let sit for a few minutes, then flush.
Baking Soda and Vinegar A natural chemical reaction that can help to break up clogs.
  1. Pour 1 cup of baking soda into the toilet bowl. 
  2. Follow with 2 cups of vinegar. 
  3. Let the mixture fizz for half an hour, then flush.
Plumbing Snake A flexible auger used to dislodge deeper clogs that a plunger can’t reach.
  1. Insert the end of the snake into the toilet bowl. 
  2. Crank the handle to extend the snake and break through the clog. 
  3. Retrieve the snake and flush.
Wet/Dry Vacuum An unconventional method using a vacuum to suck out the clog (do not use a regular vacuum cleaner).
  1. Empty the water from the bowl. 
  2. Wrap a towel around the hose to create a seal. 
  3. Turn on the vacuum to suck up the clog.
Closet Auger A specialized tool designed to navigate the toilet’s S-bend.
  1. Insert the auger’s end into the toilet bowl. 
  2. Crank the handle while pushing to extend the auger into the drain. 
  3. Pull out the auger and flush.
Eco-Friendly Enzyme Cleaners Enzyme-based cleaners that break down organic matter without harming pipes.
  1. Follow the product instructions to apply the cleaner. 
  2. Let it sit overnight. 
  3. Flush the toilet to clear the debris.

These methods provide various options depending on the severity and nature of the clog, allowing you to try DIY solutions before calling a professional plumber.

Common Causes of Toilet Clogs

Before you grab your DIY toolkit, it’s important to understand what can lead to a clogged toilet. Some common culprits include:

  • Excessive Toilet Paper: Overloading the toilet with too much toilet paper can easily lead to a clog.
  • Low-Flow Toilets: Some low-flow toilets may struggle to handle larger loads, contributing to clogs.
  • Hard Water Deposits: Over time, minerals from hard water can accumulate and create clogs.

Gather Necessary Tools and Supplies

Equipping yourself with the right tools and supplies will set you up for success when it comes to DIY unclogging. Here’s what you’ll need:

  • Plunger: A classic tool that uses suction to dislodge clogs. Make sure you have a good-quality plunger with a flange for better sealing.
  • Toilet Auger or Snake: This tool is designed to reach deeper clogs that a plunger might not be able to tackle.
  • Rubber Gloves: Keep your hands protected and maintain hygiene while dealing with the clog.
  • Baking Soda and Vinegar: These common household items can help break down minor clogs and neutralize odors.
  • Hot Water and Dish Soap: A simple solution that can help loosen clogs caused by organic matter.

Clogged toilet cleaning

How to Clean a Clogged Toilet

Plunger Method

  • Position the Plunger: Place the plunger over the drain hole in the toilet bowl, ensuring a snug seal.
  • Apply Pressure: Gently push the plunger down, then pull up with force. Repeat this motion to create suction and dislodge the clog.
  • Flush the Toilet: After successfully unclogging, flush the toilet to ensure proper water flow.

Toilet Auger or Snake

  • Insert the Auger: Carefully insert the toilet auger into the toilet bowl’s drain until you feel resistance.
  • Rotate and Break: While gently applying pressure, rotate the auger. This helps break apart the clog.
  • Retrieve the Auger: Slowly pull out the auger, ideally bringing the clog with it.

Toilet Unclog Solutions

Natural DIY Toilet Unclog Solutions

Baking Soda and Vinegar

  • Pour Baking Soda: Start by pouring about one cup of baking soda into the toilet bowl.
  • Add Vinegar: Follow the baking soda with one to two cups of vinegar. Be prepared for some fizzing as the reaction breaks down the clog.
  • Let It Sit: Allow the mixture to sit for a few minutes before attempting to flush.

Hot Water and Dish Soap

  • Add Dish Soap: Squeeze a few tablespoons of dish soap into the toilet bowl.
  • Pour Hot Water: Carefully pour hot (but not boiling) water from a bucket into the bowl. The force can help dislodge the clog.
  • Wait and Flush: Allow the soapy water to sit, then flush to see if the clog has cleared.

In conclusion, armed with the knowledge and techniques of DIY unclogging, you can confidently tackle a clogged toilet without the immediate need to contact a plumber. By understanding the common causes of clogs and having the right tools at hand, such as a plunger, toilet auger, baking soda, vinegar, and hot water with dish soap, you’re equipped to handle minor blockages effectively.

However, it’s important to recognize your limits. While these DIY methods are powerful, there may be instances where a clog is particularly stubborn or indicative of a deeper plumbing issue. In such cases, it’s wise to know when to reach out to a professional plumber. If your efforts to DIY unclog a toilet aren’t yielding results or if you’re unsure about the underlying cause, don’t hesitate to seek expert assistance.

The beauty of DIY unclogging methods lies in their accessibility and cost-effectiveness. They empower you to take control of a situation that might otherwise seem daunting. So, before you rush to call a plumber, try these DIY how to unclog a toilet strategies first. By mastering these techniques, you not only save money but also gain the satisfaction of resolving an everyday challenge on your own.

Conclusion

Dealing with a clogged toilet can be stressful, but with the right tools and techniques, many blockages can be resolved without professional help. From using a plunger or toilet auger to applying hot water and dish soap, these simple DIY methods are often enough to get your bathroom back in working order. However, if the problem persists or recurs frequently, it might indicate a deeper issue in your plumbing system. Don’t hesitate to reach out to the experts at POM Plumbing — we’re here to help when DIY solutions aren’t enough.

FAQ about a clogged toilet, how to clean it yourself?

What are the essential safety precautions to take before attempting DIY clogged toilet resolutions?

Essential safety precautions before attempting DIY clogged toilet resolutions include wearing rubber gloves, avoiding chemical cleaners, and ensuring proper ventilation in the bathroom.

Are there any natural DIY solutions for unclogging toilets, and what ingredients are commonly used in these methods?

Yes, natural DIY solutions for unclogging toilets include using baking soda and vinegar, or hot water and dish soap. These household ingredients can help break down clogs without harsh chemicals.

When should homeowners seek professional help for a clogged toilet, and what are the warning signs of a more serious plumbing issue?

Homeowners should seek professional help if DIY methods fail, the toilet clogs frequently, or if there’s water backup. Warning signs of a serious plumbing issue include slow drainage in multiple fixtures and gurgling sounds in drains.

4 Plumbing Upgrades That Will Increase Your Home’s Value

When it comes to enhancing your home’s value, plumbing upgrades might not be the first thing that comes to mind, but they can certainly have a significant impact. Modernizing and improving your plumbing system can not only boost the functionality and efficiency of your home but also add to its overall appeal. From revitalizing bathrooms to renovating kitchen plumbing and embracing innovative technologies like tankless water heaters, here are four plumbing upgrades that can elevate your home’s worth.

Understanding the Impact of Plumbing Upgrades on Home Value

You might wonder, “Does new plumbing increase home value?” The answer is a resounding yes. Upgrading your plumbing system can offer numerous benefits that directly contribute to your property’s value appreciation. Here’s how these upgrades can influence your home’s appeal:

  • Enhanced Efficiency: New plumbing systems often come with advanced features that minimize water wastage, reducing utility bills and appealing to eco-conscious buyers.
  • Reduced Maintenance: Modern plumbing systems are designed to be more durable and require less frequent maintenance, which is a selling point for potential buyers.
  • Aesthetic Improvement: Updated plumbing fixtures and designs can enhance the visual appeal of your home, making a positive first impression on visitors and potential buyers.

Bathroom Plumbing Enhancements

Bathrooms are focal points for both homeowners and prospective buyers. Consider these plumbing enhancements to elevate your bathroom’s value:

  • Low-Flow Fixtures: Install water-efficient faucets, showerheads, and toilets. These upgrades not only conserve water but also cater to environmentally conscious buyers.
  • Luxurious Upgrades: Upgrading showers and tubs to offer spa-like experiences can make your bathroom a haven of relaxation and increase the property’s overall allure.
  • Functional Additions: Incorporate practical features like dual vanity sinks to accommodate couples and families, enhancing the bathroom’s usability.

Renovating the Kitchen Plumbing

The kitchen is often the heart of the home, and its plumbing upgrades can have a substantial impact on its value:

  • Modern Faucets: High-quality faucets with innovative features not only improve the kitchen’s functionality but also add an element of sophistication to the space.
  • Energy-Efficient Appliances: Opt for energy-efficient dishwashers and refrigerators, showcasing your commitment to sustainability while also reducing utility costs.
  • Enhanced Convenience: Adding or upgrading a garbage disposal unit can make kitchen cleanup more convenient, appealing to potential buyers.

Advantages of a Tankless Water Heater

Tankless water heaters are an example of innovative plumbing technology that can significantly enhance your home’s value:

  • Unlimited Hot Water: Tankless heaters provide hot water on demand, ensuring you never run out during a shower or other household tasks.
  • Energy Efficiency: By only heating water when needed, these heaters reduce energy consumption compared to traditional water tanks that constantly maintain hot water.
  • Space-Saving Design: Their compact size frees up valuable space in utility areas, making them an attractive option for modern homes.

Replace Your Drains

Drains might not always be in the spotlight, but their functionality is crucial for a well-maintained plumbing system:

  • Improved Drainage: Replacing old or clogged drains can prevent slow drainage issues and potential water damage, making your plumbing system more reliable.
  • Enhanced Aesthetics: New and well-designed drains can add a touch of modernity to sinks, showers, and bathtubs, contributing to the overall visual appeal.
  • Preventive Measure: Upgrading drains proactively can prevent future plumbing problems, providing peace of mind to potential buyers.

So, how much does new plumbing increase home value? The answer depends on various factors, including the scope of upgrades and the real estate market in your area. However, one thing is clear: investing in these plumbing upgrades not only enhances your property’s value but also improves your daily living experience. As you embark on these improvements, remember that a well-maintained and modern plumbing system can pay dividends in terms of potential resale value and the overall enjoyment of your home.

FAQ about modernizing plumbing

What is the average cost of plumbing upgrades?

The average cost of plumbing upgrades can vary widely depending on the type and extent of upgrades, but it often ranges from a few hundred to a few thousand dollars.

Can I DIY plumbing upgrades, or should I hire a professional?

Whether to DIY plumbing upgrades or hire a professional depends on your skill level and the complexity of the project. While simple tasks like changing faucets might be manageable, more complex upgrades should be done by a professional plumber to ensure safety and quality.

How long do plumbing upgrades typically last before replacement?

The lifespan of plumbing upgrades varies based on factors like the quality of materials used, maintenance, and usage. On average, well-executed plumbing upgrades can last anywhere from 10 to 20 years or even longer before needing replacement.

What to Do If Your Tap Water Looks Rusty

Have you ever turned on your tap, expecting clear and clean water, only to be greeted by an unsettling rusty hue? Rusty tap water can be a cause for concern, but before you panic, it’s important to understand why it happens, the potential health risks, and how to address the issue. In this guide, we’ll walk you through the reasons behind brown water from tap, or rusty water from tap, and provide actionable steps to deal with this situation.

If your tap water appears rusty or water is rusty, it could be due to corrosion in your pipes or the presence of iron in your water supply. Rusty water can be a nuisance, affecting both the safety and aesthetics of your drinking water, as well as potentially staining sinks and laundry. Here’s a table summarizing the steps you should take if you encounter rusty tap water:

Step Action
1. Determine the Source Run cold water from different faucets to check if the rust is localized or widespread throughout your home. If only hot water is rusty, the issue might be your water heater.
2. Flush Your System Run cold water for several minutes from all taps to clear out the rust. This may resolve temporary disturbances from repairs or changes in water supply.
3. Inspect and Clean Aerators Rust particles can accumulate in faucet aerators. Remove, clean, or replace these as needed to improve water quality.
4. Check External Sources If the problem persists, it might be from the external supply. Check with neighbors or contact your local water utility to see if the issue is widespread.
5. Test Your Water Consider having your water tested for iron, manganese, and other contaminants to understand the extent of the problem and potential health risks.
6. Use Filters Install water filters certified to remove iron and rust particles. Be sure to maintain and replace filters according to the manufacturer’s recommendations.
7. Consult Professionals If the issue continues, consult a plumber to check for corroded pipes needing replacement or repair within your home. For water heaters, seek advice from a professional for inspection or replacement.
8. Report and Follow Up Report persistent issues to your water utility for investigation. Follow up as necessary to ensure the problem is addressed.

Addressing rusty tap water promptly can help protect your health, maintain your plumbing system, and ensure the quality of your water supply.

Why is Brown Water From the Tap Flowing?

Brown water flowing from your tap might seem alarming, but it’s a common occurrence caused by various factors. The discoloration can range from a light yellow to a deep reddish-brown, and it’s usually due to the presence of rust in the water pipes, or sediments in the water.

Rusty Water Health Risks

While the sight of brown tap water may be off-putting, the immediate health risks associated with rusty water are generally low. The discoloration is primarily due to the presence of sediments or rust particles and does not necessarily indicate that the water is contaminated. However, it’s still important to take precautions:

  • Avoid Consumption: If your tap water appears brown, avoid using it for drinking, cooking, or preparing beverages until the issue is resolved.
  • Skin Irritation: While not common, using water rusty or rusty water from tap for bathing or washing dishes could potentially cause skin irritation due to the presence of particles in the water.

Causes of Rusty Tap Water

The disconcerting sight of rusty tap water can often be attributed to specific underlying causes within the plumbing system. Understanding these causes is essential for effectively addressing the issue and restoring clear, clean water flow.

Damaged or New Water Pipes

One of the main causes of rusty tap water is the deterioration of old or damaged water pipes. Over time, pipes can corrode and rust, especially if they’re made of iron or steel. If your home has recently undergone plumbing repairs or has aging pipes, this could contribute to the discoloration.

Rusty Pipes

Rusty pipes within your plumbing system can also lead to brown water issues. Even if the main water supply is clear, internal rust buildup within your home’s pipes can flake off and mix with the water, giving it a rusty appearance.

Water Heater Issues

Your water heater might be another culprit behind rusty water. Sediments can accumulate at the bottom of the heater’s tank, and when the water is heated, these particles can mix with the water supply, causing it to appear discolored.

Sediments in the Water Supply

Another cause of discolored water is the presence of sediments in the water supply. Sediments like sand, silt, and minerals can accumulate in water mains and pipes. When the water flow is disrupted or when maintenance work is carried out on the water distribution system, these sediments can be stirred up and make their way into your tap water, giving it a brown hue.

Dealing with Rusty Tap Water

If you’re faced with rusty tap water, here’s what you can do to address the problem:

  • Contact Your Water Provider
    If you notice brown water from tap or rusty tap water, it’s a good idea to contact your water provider. They can provide information about ongoing maintenance or potential issues with the water distribution system in your area. They might also be able to offer guidance on whether the water is safe for use.
  • Flush the System
    In some cases, running the taps for a few minutes can help clear out the discolored water. Start by running cold water at the highest point in your home, typically an upstairs faucet. Let the water run for several minutes until it runs clear. Then, repeat the process with the hot water taps.
  • Use a Water Filter
    Consider using a water filter specifically designed to remove sediments and rust particles from the water. While this may not address the underlying issue, it can help improve the water’s appearance and quality for everyday use.

In conclusion, encountering brown water from tap can undoubtedly be a cause for concern, but armed with the knowledge of potential culprits like rust in the water pipes, you’re better equipped to tackle the issue. Remember, rusty water from the tap is often a result of sediment disruption, corroded pipes, or water heater problems. While the sight of rusty water from the tap might be unsettling, it’s typically not a health risk in itself. By taking proactive measures such as flushing the system, checking with neighbors, inspecting your water heater, considering a water filtration system, and seeking professional guidance when needed, you can swiftly address the issue of rusty water from the tap and restore the clear, clean water you expect in your home.

FAQ about tap water that looks rusty

How does rust get into tap water?

Rust can enter tap water when corroded pipes or fittings break down, releasing rust particles into the water supply.

Will boiling rusty water remove the rust?

Boiling rusty water might kill bacteria but won’t remove the rust particles. The water may still appear discolored.

Can I fix rusty water issues on my own?

For minor cases, you can try running cold water to flush out rust or using a water filter. However, complex issues may require a professional plumber’s expertise.

What should I do if the rusty water is coming from my home’s plumbing?

If the rust is coming from your home’s plumbing, you may need to replace old, corroded pipes. Consult a professional plumber to inspect your system and recommend appropriate solutions.

What should I do if the rusty water is coming from the municipal supply?

Contact your local water utility to report the issue. They can provide information on the cause and expected duration of the problem and may take steps to flush the system and resolve the issue.

Can I filter rusty water to make it safe for use?

Yes, installing a whole-house water filter or a point-of-use filter can help remove iron particles from your water. Make sure to choose a filter designed to handle iron and other common contaminants.

How can I prevent rusty water in the future?

Regular maintenance of your plumbing system, including flushing your water heater and replacing old pipes, can help prevent rusty water. Using water softeners or filtration systems can also reduce the risk of rust in your water.

Is rusty water safe to use or drink?

Rust in the water isn’t generally harmful if ingested in small amounts, but it can make the water taste metallic and unpleasant. It’s not recommended for drinking, cooking, or bathing until the issue is resolved, as the rust can be indicative of broader water quality issues.

What should I do if my water suddenly turns rusty?

First, try to determine if the discoloration is affecting both hot and cold water:
– If it’s only in the hot water, the issue might be your water heater.
– If both hot and cold water are rusty, it’s likely a problem with the pipes.

How can I fix rusty water coming from my taps?

Here are some steps to take:
– Flush your system by running cold water through all taps for a few minutes.
– Inspect pipes for visible signs of rust and corrosion.
– Consider installing a whole-house water filter or specific point-of-use filters.
– Regularly maintain and possibly replace your water heater if it’s old.

When should I call a professional plumber?

Call a plumber if:
– You cannot determine the source of the rust.
– The problem persists after flushing your system.
– You need an inspection or replacement of old and corroded pipes.

Can rusty water cause damage to my home?

Yes, rusty water can stain sinks, bathtubs, and laundry. It can also contribute to further corrosion of your plumbing, potentially leading to leaks or other costly damages.

Causes of Low Water Pressure in Bathroom Sink: How to Repair It?

Water pressure is an essential aspect of our daily lives, ensuring a steady flow of water for various household activities. However, when low water pressure issues arise, it can disrupt our routines and cause frustration. Whether it’s a bathroom sink with weak water flow or overall poor water pressure throughout the house, understanding the common causes and finding effective solutions is crucial. In this article, we will delve into the world of water pressure problems in residential buildings. We will explore the signs and symptoms to look out for, the effects on plumbing systems and appliances, troubleshooting tips for homeowners, and when it’s time to call a professional plumber on demand. By gaining a deeper understanding of these issues, you’ll be equipped with the knowledge needed to eliminate water pressure problems and restore the optimal flow of water in your home. Let’s dive in and discover the keys to resolving water pressure issues once and for all.

Water Pressure Problems: Signs and Symptoms to Look Out For

Identifying water pressure problems is the first step in resolving them. Keep an eye out for these signs and symptoms.

The pressure regulator is broken 

One possible cause of low water pressure is a broken pressure regulator. The pressure regulator is a device that controls the flow of water into your home, ensuring it stays at a consistent pressure. If the regulator malfunctions, it can lead to decreased water pressure. To determine if the pressure regulator is the culprit, check if the pressure is low in all areas of your home. If it is, you might need to call a professional plumber to inspect and replace the faulty regulator.

The water heater is to blame 

Another common cause of low water pressure is a malfunctioning water heater. Sediment build-up or a faulty pressure relief valve in the water heater can restrict the flow of water, resulting in decreased pressure throughout your home. To address this issue, start by checking the temperature setting on your water heater. If it’s set too high, lower it to a safe and appropriate level. If the problem persists, consider flushing the water heater to remove any sediment or contacting a professional for further assistance.

The fixture is dirty, damaged, or clogged 

Sometimes, low water pressure can be attributed to individual fixtures such as faucets or showerheads. Accumulated mineral deposits, debris, or damage within the fixture can restrict the water flow, leading to reduced pressure. To tackle this problem, you can try cleaning the fixtures by soaking them in vinegar or using a descaling solution. If cleaning doesn’t solve the issue, it may be necessary to replace the fixture entirely.

There is a hidden leak 

Undetected leaks within your plumbing system can significantly impact water pressure. Hidden leaks can occur in pipes behind walls or under the ground, causing water to escape before it reaches your fixtures. If you suspect a hidden leak, monitor your water meter to check for any unusual activity when no water is being used. Additionally, inspect your walls, ceilings, and floors for signs of water damage or mold. If you discover a hidden leak, it’s essential to contact a professional plumber to locate and repair the leak promptly.

Water Pressure Problems: Effects on Plumbing Systems and Appliances

Understanding the effects of low water pressure on your plumbing systems and appliances is crucial for preventing further damage. Here are some potential consequences:

  • Strained Plumbing Fixtures: Insufficient water pressure can put a strain on your plumbing fixtures, leading to leaks, drips, and premature wear and tear. It can also cause issues with flushing toilets and filling appliances like washing machines.
  • Inefficient Water Usage: When water pressure is low, it takes longer to complete everyday tasks like washing dishes or taking a shower. This can result in wasted time and increased water consumption.
  • Reduced Performance of Appliances: Appliances that rely on proper water pressure, such as dishwashers and sprinkler systems, may not function optimally, affecting their overall performance and efficiency.

Water Pressure Problems: Troubleshooting Tips for Homeowners

Before calling a professional plumber, you can try these troubleshooting tips to address low water pressure issues:

  1. Check for Localized Blockages: Start by inspecting the aerators and showerheads for mineral deposits or debris buildup. Clean or replace them if necessary, as clogs in these components can restrict water flow.
  2. Examine Water Valves: Ensure that the main water valve, as well as any individual shut-off valves for specific fixtures, is fully open. Sometimes, valves can inadvertently be partially closed, reducing water pressure.
  3. Test Pressure Regulator: Locate the pressure regulator, usually near the main water line, and check if it is functioning correctly. If it’s faulty, consult a professional to have it repaired or replaced.

Water Pressure Problems: When to Call a Professional Plumber

While some water pressure issues can be resolved by homeowners, there are situations where professional assistance is necessary. Consider contacting a plumber under the following circumstances:

  • Persistent Low Water Pressure: If your troubleshooting attempts haven’t resolved the issue, or if the problem recurs frequently, it’s advisable to seek professional help. A plumber can conduct a comprehensive evaluation and identify underlying causes.
  • Tankless Water Heater Issues: Tankless water heaters require specific water pressure levels to operate effectively. If you suspect that your tankless water heater is causing the low water pressure, it’s best to consult a plumber with expertise in these systems.

In conclusion, low water pressure in residential buildings can stem from various causes, including localized faucet issues, plumbing system complications, or problems with water heaters. By recognizing the signs, understanding the effects, and attempting troubleshooting measures, homeowners can address some of these issues on their own. However, if the problems persist or involve complex systems, it’s wise to seek professional assistance to ensure a reliable and efficient water supply throughout your home.