****
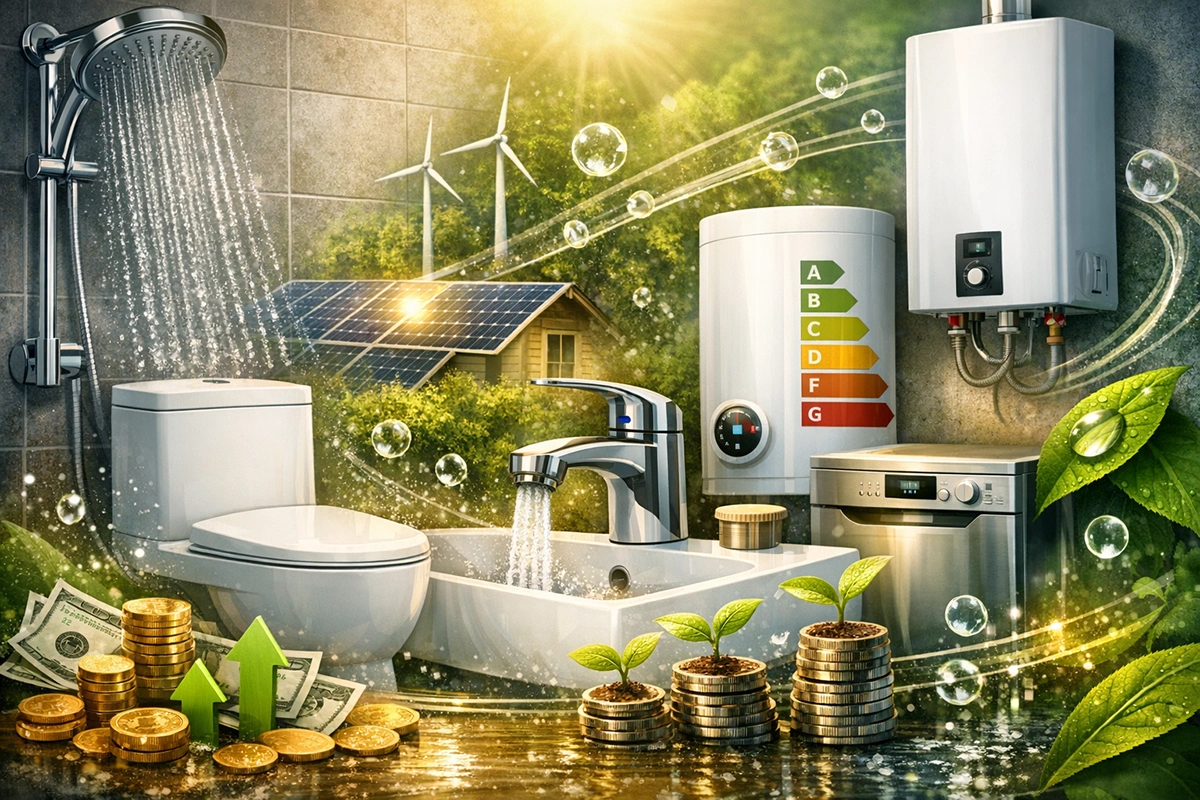
Is energy-efficient plumbing worth the cost? We analyze the pros and cons of tankless heaters, low-flow fixtures, and smart leak detectors to help you save on utility bills.****
Uncategorized Articles - Page 4 of 23 - POM Plumbing Blog
For many Canadian homeowners, “going green” is no longer just an environmental statement—it is a financial necessity. With rising utility rates and carbon taxes, the cost of running a home is increasing. Plumbing fixtures, often overlooked, are actually some of the biggest energy and water consumers in your house.
But does energy efficient plumbing save money in the real world, or is it just marketing hype? The truth lies in the data. Modernizing your plumbing infrastructure can yield a significant Return on Investment (ROI) while improving your home’s functionality. Let’s dive into the technical and financial benefits of these upgrades.
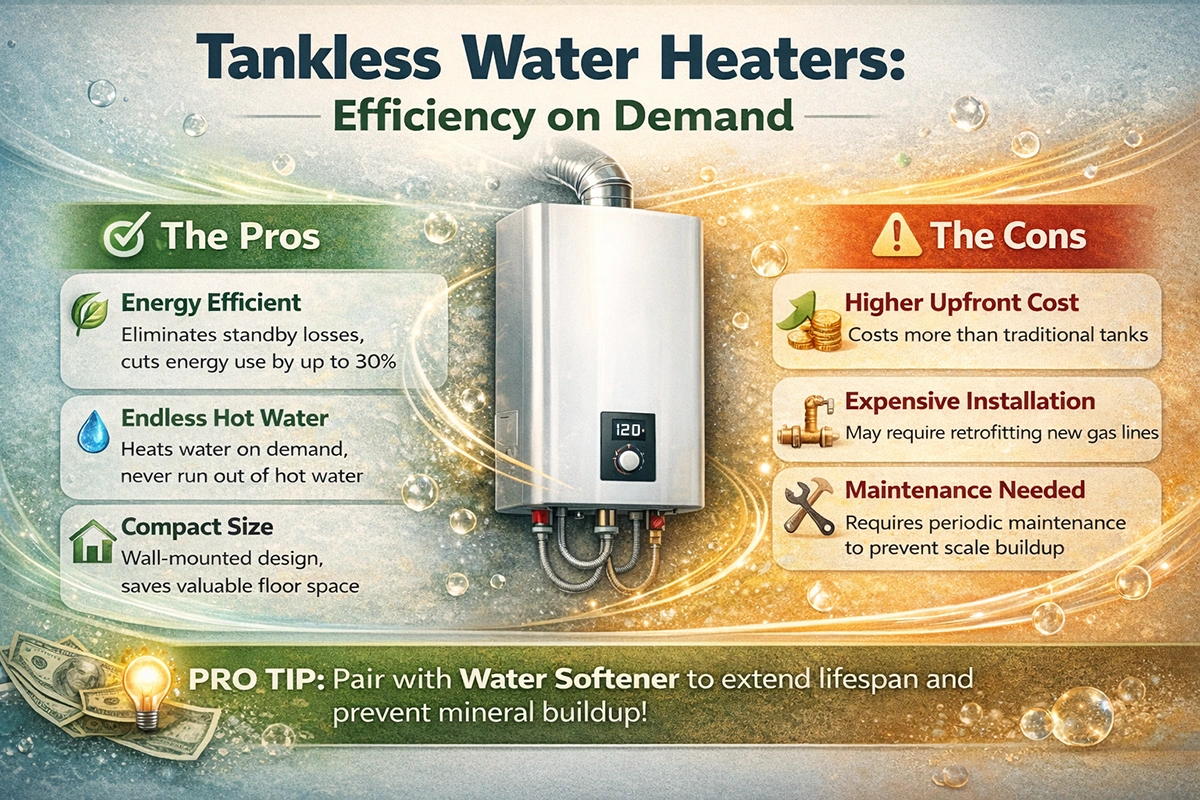
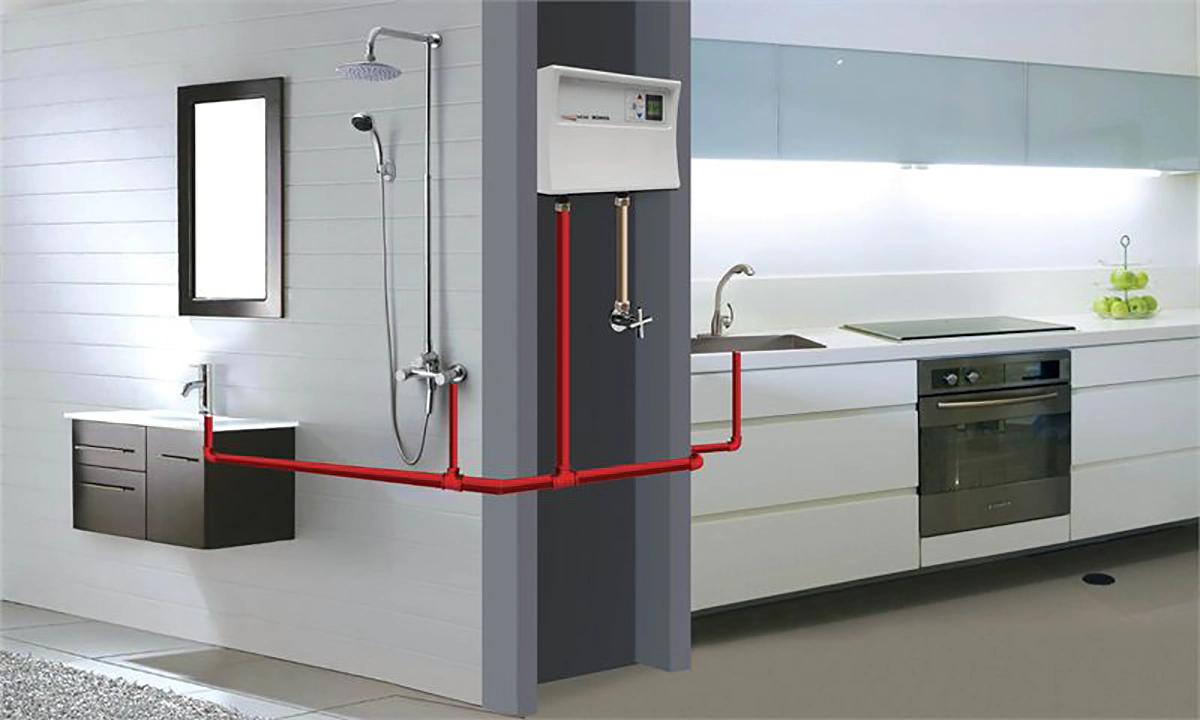
1. Tankless Water Heaters: Efficiency on Demand
The biggest energy hog in your basement is likely your water heater. Traditional tanks keep 40–60 gallons of water hot 24 hours a day, even when you are asleep or at work. This “standby loss” is a massive waste of gas or electricity.
To decide if an upgrade is right for your home, it is essential to weigh the tankless water heater pros and cons.
The Pros: Tankless units heat water only when needed. When you open a tap, powerful burners ignite instantly. This eliminates standby energy loss entirely, reducing energy use by up to 30%. Additionally, they are wall-mounted, saving valuable floor space.
The Cons: They have a higher initial cost compared to a standard tank, and retrofitting may necessitate upgrading gas lines.
Pro Tip: To protect this investment from mineral buildup and ensure longevity, consider pairing your new heater with professional Water Softener Installation.
2. Modern Toilets: High Performance, Low Waste
Back in the 1990s, “low-flow” toilets often experienced frequent blockages. Fortunately, technology has advanced considerably since then. Today, High-Efficiency Toilets feature improved hydraulic systems and larger trap ways.
When evaluating low flow toilets pros and cons, it becomes clear that the technology has matured:
Efficiency: Flushing makes up nearly 30% of average indoor water use. Modern units flush effectively using only 4.8 litres or less.
Dual Flush: Many models now feature dual flush options—a light flush (3L) for liquid waste and a full flush for solids. This can save a family of four more than 50,000 litres of water each year.
However, modern designs have improved significantly. If your current unit is constantly running or leaking, a simple Toilet Repair might fix it, but upgrading to a high-efficiency model is often the more cost-effective long-term solution.
3. Faucets and Fixtures: The Hidden Savings
You don’t have to tear down walls to enjoy the benefits of low flow fixtures. Swapping out an old shower head (which uses 9.5 liters per minute) for a Water Sense-certified one (just 7.6 liters per minute) can reduce your water use by 20%.
Best of all, since you’re using less hot water, you’ll also see savings on your gas or electric bill. It’s a wonderful double benefit that helps the new fixture pay for itself in just a few months.
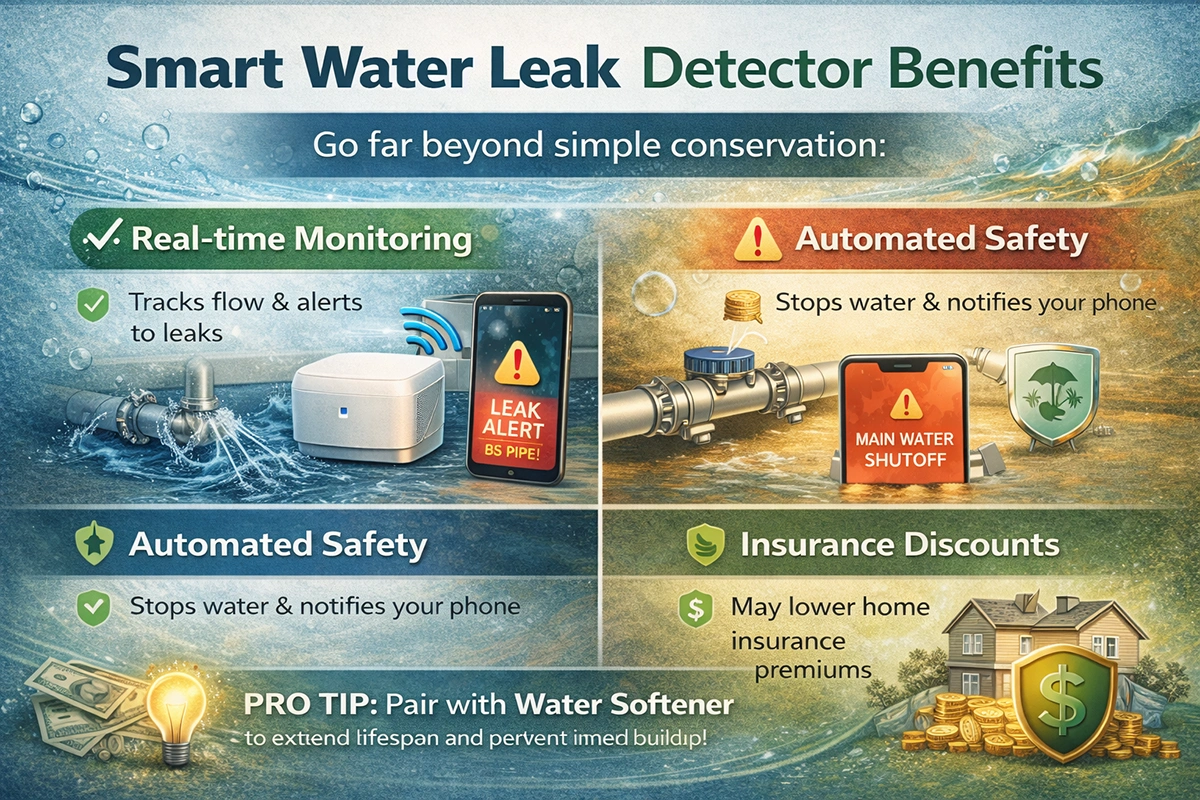
4. Smart Leak Detectors: Protection and Peace of Mind
Efficiency isn’t just about lowering consumption; it’s about preventing resource waste. A tiny pinhole leak can waste thousands of litres of water before a damp patch appears.
The smart water leak detector benefits go far beyond simple conservation:
Real-time Monitoring: These WiFi-connected devices monitor flow rates and detect unusual activity, like a burst pipe when you’re not home.
Automated Safety: They can instantly turn off your main water supply and notify your phone.
Insurance Discounts: Many insurance companies now offer discounts on premiums for homes equipped with these systems.
5. The Bigger Picture: Sustainability
Let’s take a moment to look beyond our utility bills. The environmental impact of water conservation is profound and creates a positive ripple effect in our community.
Treating and pumping water require a lot of energy. By being conscious of our water consumption at home and using less, we reduce strain on local infrastructure and decrease our carbon footprint, helping create a cleaner, healthier environment.
Thinking about upgrades? Investing in energy-efficient plumbing is a great step toward increasing your home’s value and efficiency. Whether you’re considering replacing your water heater or upgrading to smarter faucets, the friendly experts at POM Plumbing are ready to assist. We can guide you through available rebates and recommend the best products suited to your needs.
FAQ
How long does it take for a tankless heater to pay for itself?
On average, the energy savings pay for the installation difference in about 3 to 5 years, but the unit lasts 20+ years (twice as long as a tank).
Will a low-flow shower head feel like a drizzle?
No. Modern aerators mix air into the water stream, increasing the pressure velocity. You get a strong, satisfying spray while using significantly less water.
Are smart leak detectors hard to install?
Clamp-on models are DIY-friendly, but the most effective models (with auto-shutoff valves) require professional installation into the main water line.
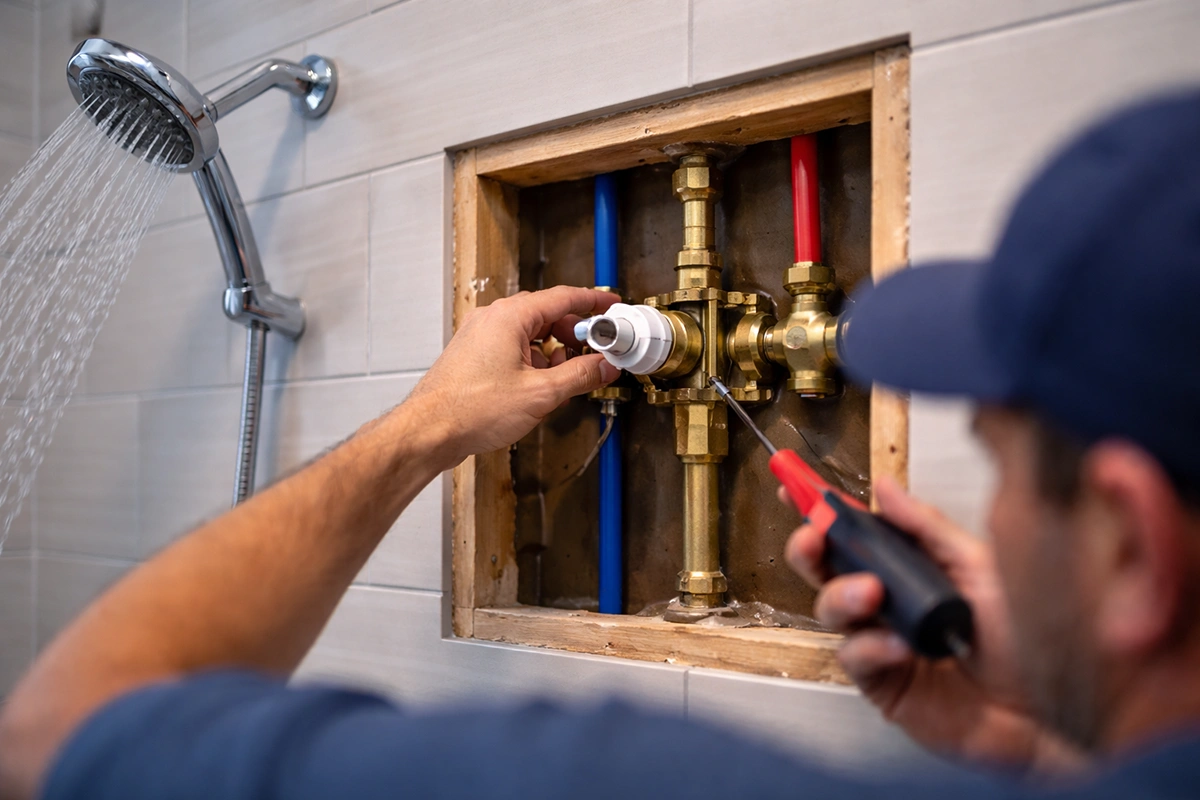
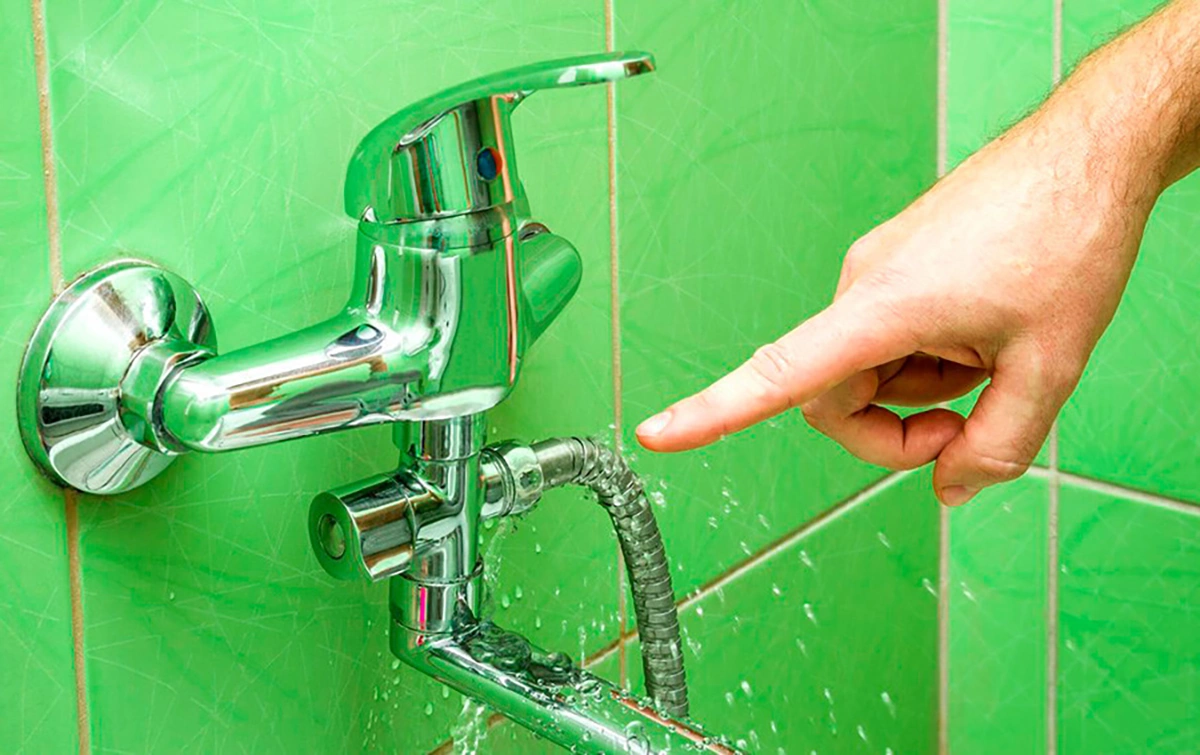
We have all been there: you are enjoying a warm, relaxing shower, and suddenly, without warning, the water turns cold or dangerously hot. You jump back, waiting for the temperature to stabilize, wondering what just happened.
This phenomenon is known as “thermal shock,” and it is not just a nuisance; it is a sign that your plumbing system lacks a critical component or that a specific part has failed. If you’re wondering why your shower water randomly switches between hot and cold, the answer often lies inside your wall within a component called a mixing valve.
In this guide, we will break down the mechanics of shower valves, explain why modern homes are required to have them, and help you decide if it is time for an upgrade.
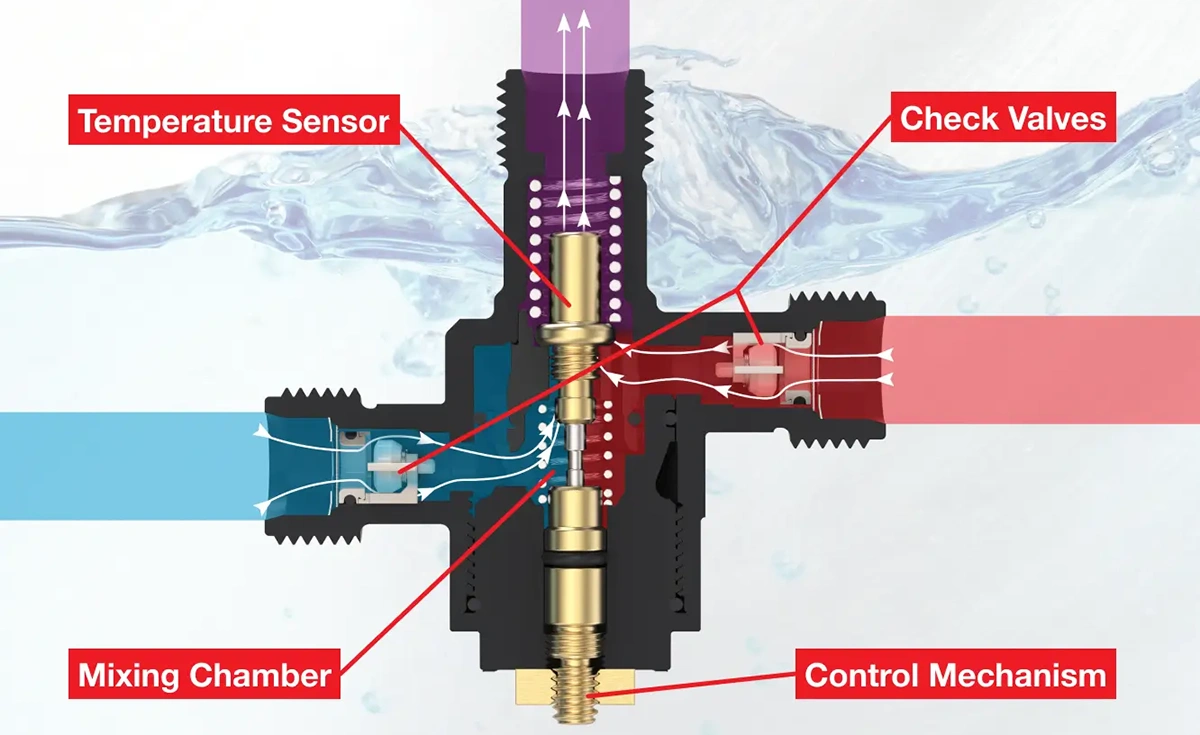
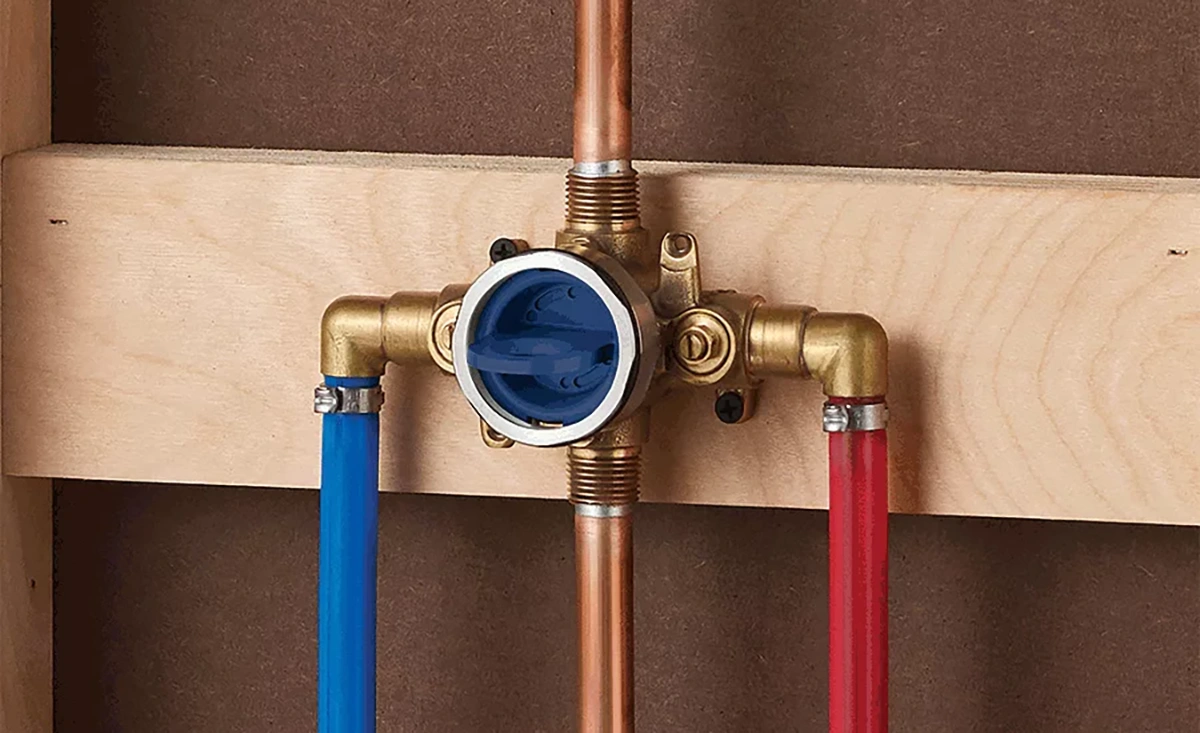
What Is a Mixing Valve? The Mechanics Explained
To understand the solution, we must first define the device. What is a mixing valve? In technical terms, it is the heart of your shower faucet. It is a brass component installed behind the shower handle that blends the hot water from your water heater with the cold water from your main supply line.
But a modern mixing valve does more than just blend; it regulates. Shower mixing valve explained simply: It makes sure the water temperature stays steady even if pressures in your home’s pipes change. In larger buildings, it works together with Riser and Zone Valves Replacement to control overall building pressure.
Symptoms of a Missing or Faulty Valve
How do you know if your home lacks this protection or if your existing valve has a bad cartridge? Look for these three signs:
The “Toilet Flush” Effect. This is the most common sign. If your shower turns cold when the toilet flushes (or becomes very hot), your plumbing system is not balancing pressure properly. When the toilet refills, it uses a large amount of cold water, causing a pressure drop in the cold line. Without a functioning mixing valve, hot water then takes over, potentially scalding anyone in the shower.
Constant Temperature Adjusting. If your shower temperature varies during use and you frequently need to adjust the handle left or right, the internal cartridge may be clogged with mineral deposits or worn out. This issue is common in areas with hard water.
Delayed Reaction. Does the water take a moment to start flowing when you turn the handle? That “spongy” feeling is often a sign that the internal mechanism might be beginning to fail.
Comparing Technologies: Thermostatic vs. Pressure Balance
Not all valves are created equal. When upgrading, you will face a choice between two main technologies. Understanding the thermostatic mixing valve vs pressure balance difference is crucial for your comfort and budget.
Option A: Pressure Balance Valve (The Standard)
How it works: It senses changes in water pressure. When cold pressure drops, a piston inside shifts to block some hot water.
Pros: Lower cost, reliable, standard in most North American homes.
Cons: It only controls the ratio, not the exact temperature. If you turn down the volume, the temperature might shift.
Option B: Thermostatic Mixing Valve (The Upgrade)
How it works: It uses a wax element that expands and contracts when heated. It automatically adjusts hot and cold inputs to keep a specific temperature (e.g., 38 °C).
Pros: You have complete control. You can adjust the temperature with one handle and the water flow with another. Perfect for “rain” shower heads.
Cons: Higher startup cost.
Safety First: Preventing Scalding
The most critical reason to address these issues is safety. Preventing shower scalding is a top priority, especially for households with children or elderly family members who may have slower reaction times. A sudden burst of hot water can cause serious burns in seconds.
Modern building codes require anti-scald protection. If you live in an older home with two-handle faucets (one for hot, one for cold), you might not have this protection. Installing an anti-scald valve shower system is one of the most effective safety upgrades you can make.
Conclusion: Do You Need a Plumber?
If you’re dealing with these issues, you have two options: replace the internal cartridge (repair) or install a new valve body (renovation). While changing a cartridge can often be a DIY project, replacing the valve usually involves soldering and working behind the wall.
Don’t put up with the “shower dance” any longer. Reach out to POM Plumbing today! We’re here to assess your system and bring back comfort to your bathroom.
FAQ
Can a mixing valve be adjusted?
Yes. Most modern valves have a rotational limit stop (a plastic ring) under the handle. Adjusting this can allow more hot water into the mix if your shower feels lukewarm.
How long does a shower cartridge last?
Typically, 10 to 15 years. However, hard water can significantly shorten this lifespan by causing mineral buildup that clogs the piston.
Why is my water pressure low only in the shower?
If other faucets are functioning properly, the issue is likely debris inside the mixing valve or a clogged shower head, rather than a problem with your main water line.
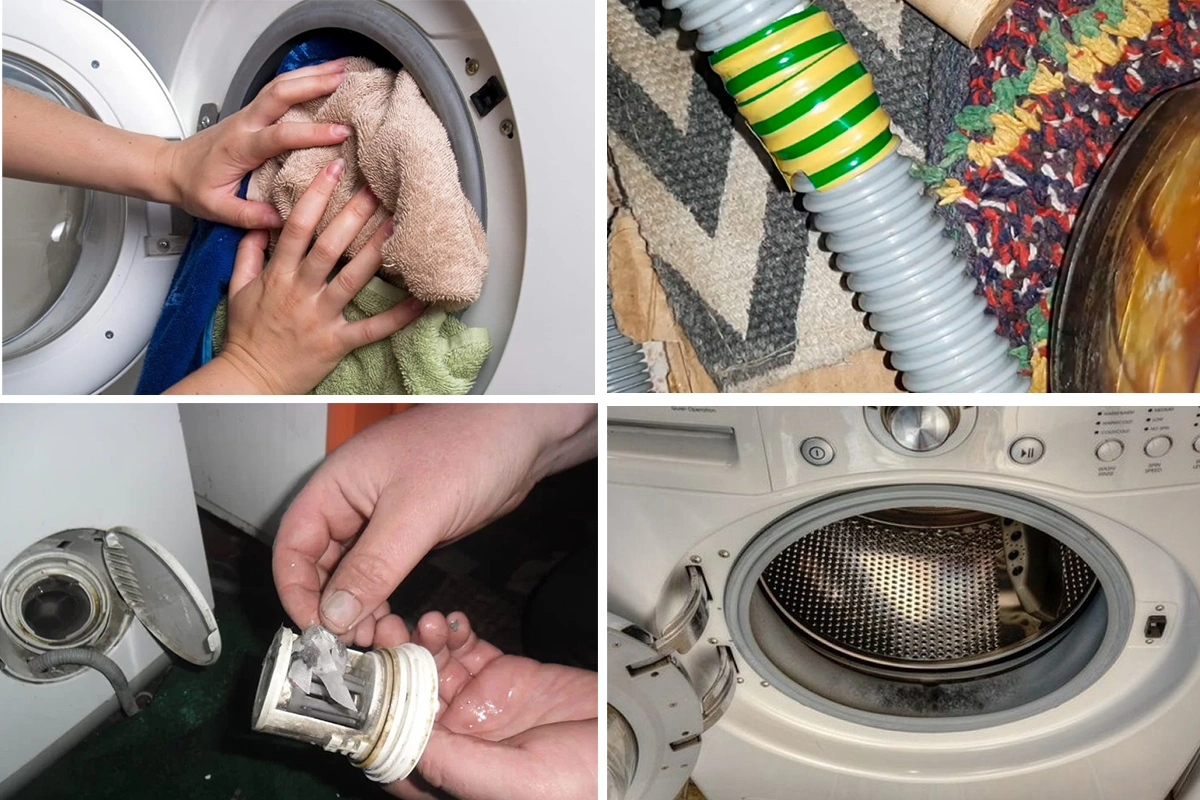
Your plumbing system works silently in the background every day, but small habits that seem harmless can slowly damage it from the inside. Many homeowners don’t realize how daily routines — from how they cook to how they clean — contribute to leaks, clogs, corrosion, and premature pipe failure. By understanding common plumbing mistakes, you can protect your home and avoid expensive repairs.
Why Everyday Habits Create Big Plumbing Problems
Plumbing issues rarely happen overnight. Most start with minor behaviors that gradually wear down pipes, fixtures, and drains. Pouring grease into the sink, flushing wipes, or using the wrong chemical cleaners might not cause immediate damage, but over time these habits become exactly what ruins plumbing systems. Once buildup becomes severe, repairs are no longer small — they turn into clogged sewer lines, damaged fixtures, or burst pipes.
Common Plumbing Mistakes Homeowners Don’t Notice
Many homeowners unintentionally make plumbing mistakes that slowly weaken the system. These errors develop over months or years until warning signs appear — slow drains, gurgling sounds, or recurring clogs. Small oversights, such as ignoring early leaks or allowing low water pressure to continue, can hide bigger internal problems. Because these issues progress quietly, it’s important to recognize them early and correct the routines that cause them.
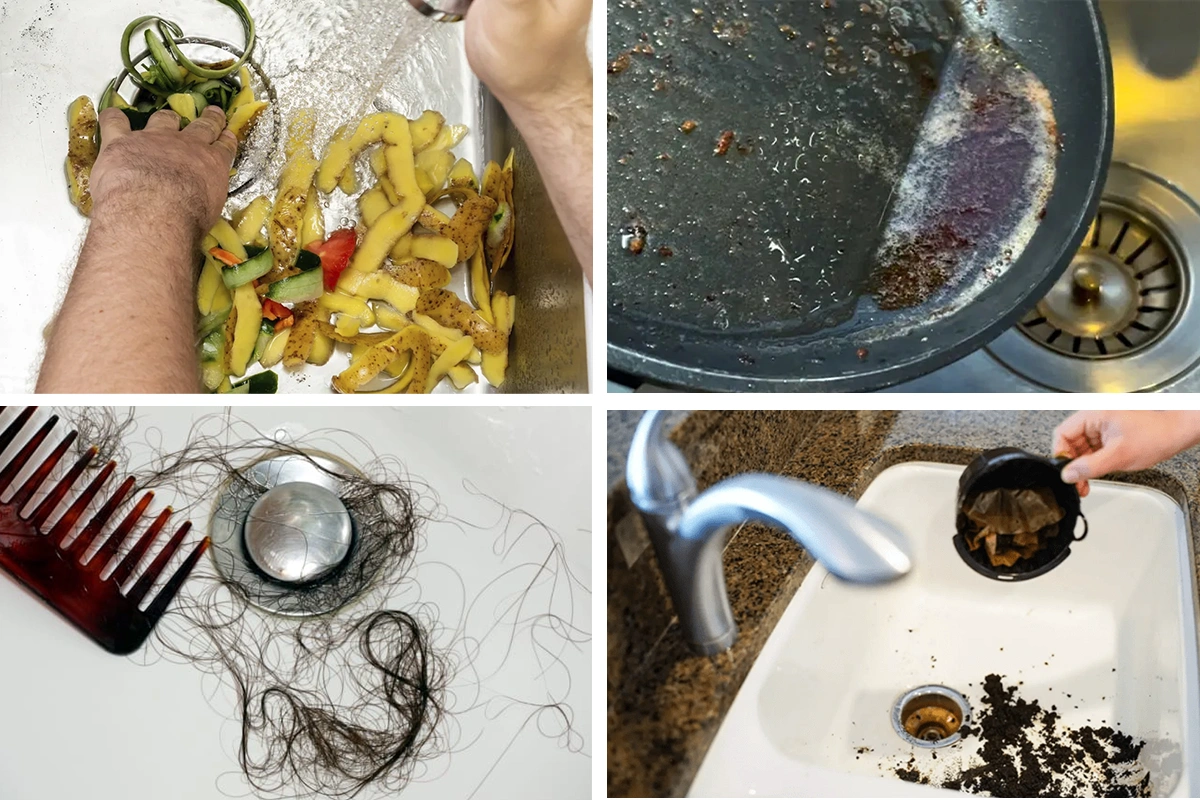
Kitchen Habits That Damage Plumbing
The kitchen is one of the most high-risk areas for hidden plumbing damage. Certain foods and liquids easily stick to pipe walls, forming thick layers of grease and sludge. Over time, these build-ups restrict water flow and produce foul smells.
Habits that quickly damage kitchen drains:
pouring cooking oil or grease into the sink
washing coffee grounds down the drain
sending fibrous foods like celery, potato peels, or onion skins into the garbage disposal
rinsing sticky sauces or melted fat with only cold water
These are some of the biggest plumbing mistakes to avoid, because even a modern garbage disposal can’t handle materials that harden inside pipes. Grease and starches create stubborn blockages, and once they cool, they solidify into dense masses that professional hydro-jetting is often required to remove.
Bathroom Habits That Quietly Harm Your Pipes
Bathroom plumbing is sensitive to what gets flushed or washed down drains. Even products labeled “flushable” break down too slowly and contribute to sewer clogging. This is one of the plumbing habits to avoid, especially in older houses with narrower drain lines.
Hair is another major problem. When combined with soap residue, it forms a dense, sticky mass that causes slow drainage and eventually full blockages. Long hair strands can wrap around drain components, making the problem worse.
Harsh chemical drain cleaners are another hidden threat. They seem effective at first, but repeated use can corrode metal pipes, break down seals, and damage older PVC. Over time, this leads to leaks behind walls or under sinks — issues far more serious than the original clog.
Laundry & Appliance Mistakes That Lead to Hidden Damage
It’s not only sinks and toilets that suffer from poor habits. Laundry machines, dishwashers, and refrigerators all connect to the plumbing system and can fail if they aren’t used properly.
Overloading your washing machine increases pressure on hoses. Detergent overuse creates residue that builds up in drain lines. Ignoring old or worn hoses is another one of the plumbing mistakes to avoid, as they can burst unexpectedly and flood entire rooms.
Dishwashers can also clog if homeowners treat them as garbage disposals. Food debris, oils, and starches clog internal filters and reduce drainage efficiency. Refrigerator water lines can freeze, kink, or crack if not inspected regularly.
Simple maintenance — checking hoses, cleaning filters, and monitoring drainage — dramatically reduces the risk of appliance-related leaks.
The Worst Plumbing Mistakes That Lead to Costly Repairs
Some of the worst plumbing mistakes create severe, expensive damage. These include flushing non-degradable items, using too much chemical cleaner, or ignoring recurring clogs. Another major issue is leaving small leaks untreated — even slow drips can lead to mold, structural damage, and soaring water bills.
DIY plumbing errors also belong to the biggest risks. Overtightening fittings, using the wrong sealants, or installing mismatched pipe materials can cause failures weeks or months later. Misaligned pipes place pressure on joints, and using incompatible metals can trigger corrosion.
These plumbing errors don’t always show immediate symptoms, which can make the eventual damage far more serious.
How to Avoid Plumbing Issues: Smart Prevention Tips
Good habits protect your plumbing system over the long term. If you want to understand how to avoid plumbing issues, a few consistent behaviors make all the difference. Throw food scraps in the trash instead of the sink. Use drain screens to catch hair. Avoid flushing wipes, cotton pads, and hygiene products. Limit harsh cleaners and choose enzyme-based drain treatments instead.
Regular maintenance, including drain cleaning, leak inspection, and appliance checkups, is essential. Even small improvements in daily habits help prevent clogs, corrosion, and hidden drain damage. By avoiding the things that damage your plumbing system, you extend the life of your pipes and minimize costly repairs.
FAQ
What everyday habits cause hidden plumbing damage?
Grease in drains, flushing wipes, and letting hair accumulate in bathroom drains are the most common causes.
Can chemical drain cleaners damage pipes?
Yes. Frequent use corrodes pipes and weakens seals, eventually causing leaks.
How often should I check appliance hoses?
Inspect washing machine and dishwasher hoses every 6–12 months to avoid unexpected bursts.
Are “flushable” wipes safe for plumbing?
No. They break down too slowly and cause clogs in both home and city sewer lines.
What is the best way to prevent kitchen drain clogs?
Dispose of grease in containers, avoid washing coffee grounds down the sink, and use plenty of hot water when rinsing dishes.
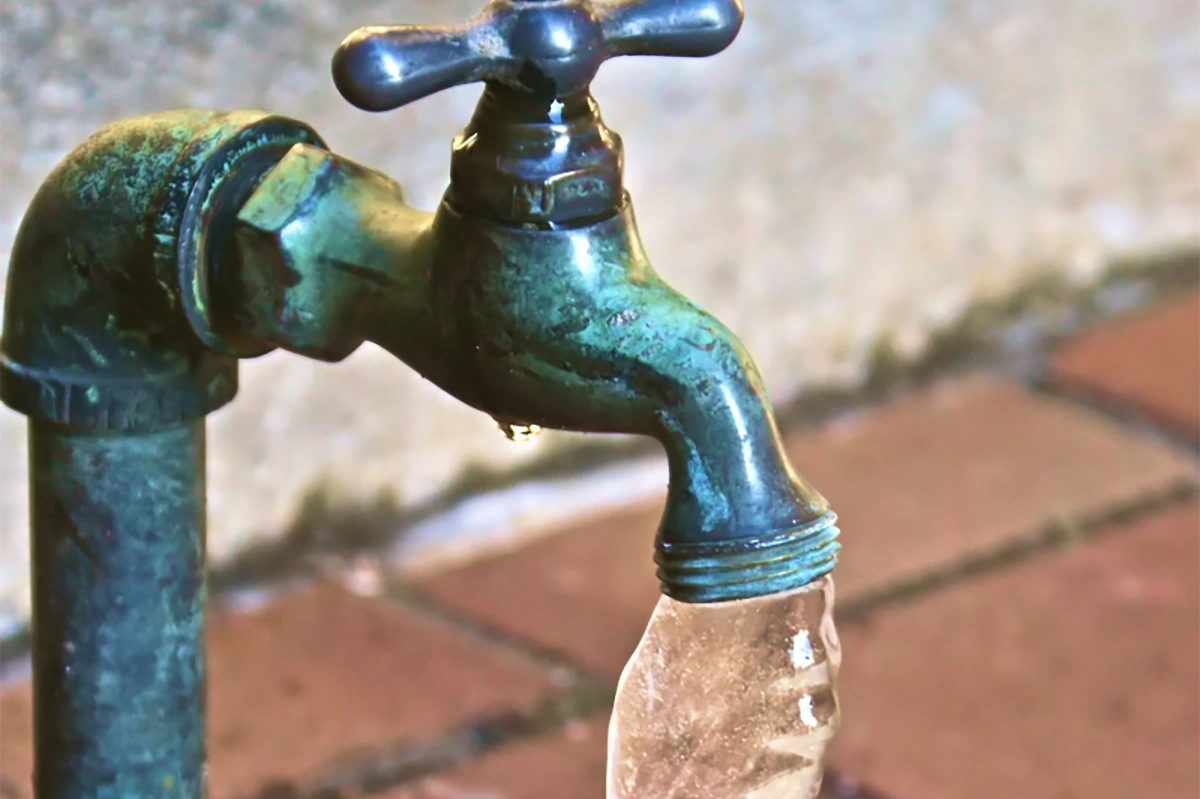
Toronto winters often bring sudden temperature drops that put plumbing systems at risk. When water freezes inside a pipe, it expands and increases pressure, which can lead to cracks or complete pipe bursts once the ice thaws. One of the simplest and most effective ways to reduce this risk is to understand when to drip faucets to prevent frozen pipes and how dripping protects your plumbing.
A slow drip keeps water moving, and moving water is far less likely to freeze. It also relieves pressure inside the pipe, giving the system more stability during long periods of cold weather. While dripping is not the only freeze-prevention method, it is a crucial part of winter plumbing protection for Toronto homes.
Why Dripping Faucets Helps During Freezing Temperatures
Many homeowners wonder whether does letting your faucet drip prevent freezing, especially during harsh cold snaps. In most cases, yes — even a small, steady drip keeps water circulating enough to slow ice formation. It also prevents pressure buildup inside the pipe, reducing the chance of a burst.
This method is especially important for older Toronto homes where plumbing may pass through exterior walls, poorly insulated basements, or areas exposed to drafts.
When You Should Let Faucets Drip
You should drip your faucets when outdoor temperatures fall to –5°C or colder. The risk increases overnight when heating cycles less frequently and pipes cool faster. Dripping is especially important if your home has a history of frozen pipes, plumbing that runs through cold areas, or fixtures installed on exterior walls.
Many people ask should you drip faucets in cold weather even when only one part of the house feels cold. The answer is yes — if a single area is significantly cooler, its pipes are at higher risk of freezing.
Which Faucets Are Most Important to Drip
Not all faucets need to drip — focus on the most vulnerable areas of your home.
Critical faucets to drip during freezing weather:
Faucets on exterior walls
Kitchen or bathroom sinks above uninsulated spaces
Lines running through basements, crawl spaces, or cold utility rooms
Fixtures farthest from the main water shut-off valve (dripping here keeps water moving through the entire system)
Homeowners also ask whether should you drip hot water faucets in cold weather. The truth is yes — hot water lines can freeze just as easily once the water cools inside the pipe.
Outdoor Faucets and Freeze Prevention
Exterior water outlets freeze faster than any indoor fixture. If your outdoor tap is connected to an active supply line, consider the question should you drip outside faucets during a freeze. If the line is still active, dripping can help prevent ice formation.
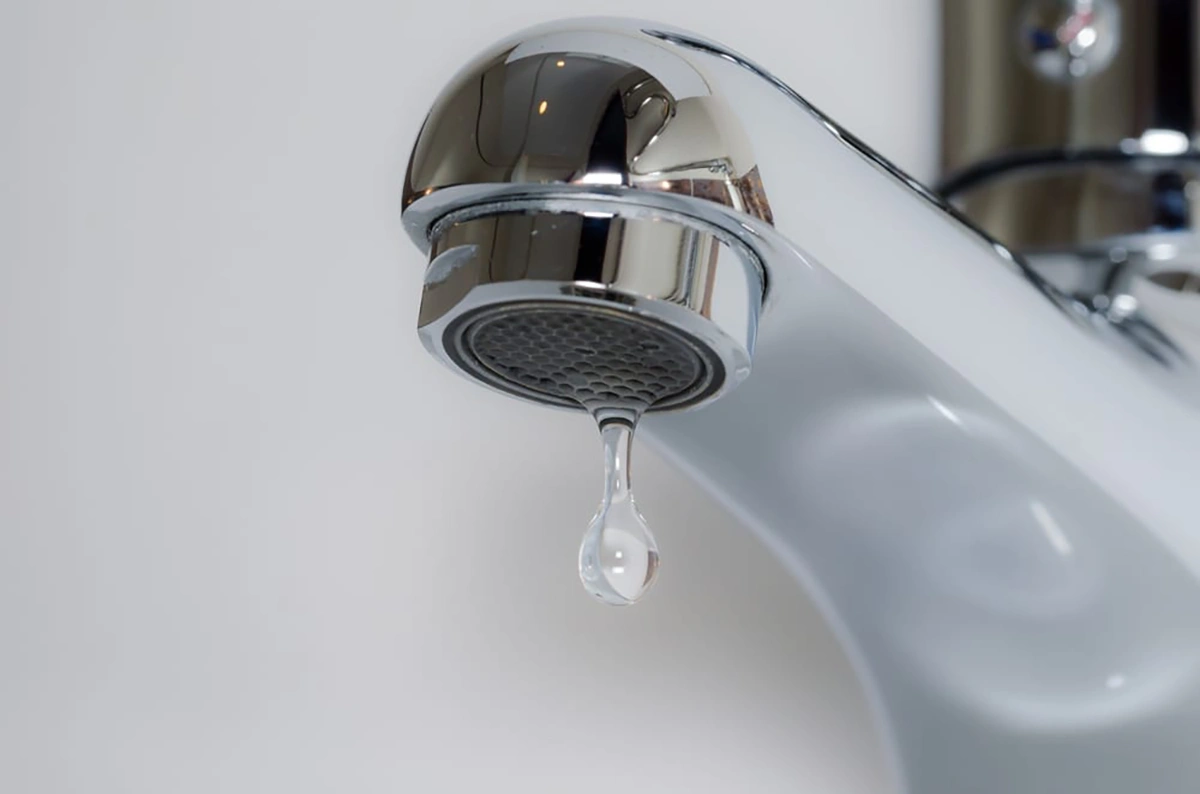
Before cold weather hits, disconnect hoses and remove attachments so water can drain properly. In spring, many homeowners search how to stop an outside faucet from dripping — usually the issue is a worn washer or loose packing nut, which can be repaired once freezing weather is over.
How to Keep a Faucet From Freezing
Dripping is helpful, but preventing frozen pipes requires additional precautions.
Additional ways to protect your plumbing:
Keep cabinet doors open to allow warm air to circulate around pipes
Insulate exposed pipes, especially those running along exterior walls
Maintain a stable indoor temperature, even overnight
Seal drafts around windows, doors, and foundation gaps
Apply heat tape to high-risk pipe sections
These measures work together with dripping to reduce the chances of frozen pipes.
Should You Leave Faucets Dripping While Away
If you leave home during extreme cold, letting faucets drip is strongly recommended. A slow, steady drip keeps water moving through the pipes, reducing the risk of freezing even when no one is home to monitor the system. Before you leave, make sure your home is heated to at least 16°C and check any pipes in particularly cold or exposed areas.
What to Do If Your Pipes Are Already Frozen
Even with the best precautions, pipes can still freeze during an especially harsh Toronto winter. If you notice reduced water flow, no water at all, or frost forming on exposed pipes, act quickly. The faster you respond, the lower the risk of a burst pipe and costly water damage.
Step
What to Do
1. Shut off the water
Turn off the main water valve immediately to prevent flooding once the pipe thaws
2. Open the faucet
Leave the affected faucet open to allow water and steam to escape as the ice melts
3. Thaw slowly
Use a hair dryer or space heater. Start near the faucet and work toward the frozen section. Never use an open flame, as it poses a serious fire hazard and can damage your pipes
4. Call a professional
If you can’t locate the frozen section or the pipe looks damaged, contact a licensed plumber right away
If the pipe has already burst or you are unsure about the extent of the damage, do not attempt to fix it yourself. Shut off the water supply and call a licensed plumber as soon as possible. Acting quickly can mean the difference between a minor repair and a major flood.
Professional Help for Frozen Pipes in Toronto
Dripping faucets and quick action can go a long way, but some situations call for a professional. If you have followed every step and still have no water flow, or if you notice visible cracks or bulging in your pipes, do not wait. Attempting to handle a severely frozen or damaged pipe on your own can lead to a full burst and thousands of dollars in water damage.
At POM Plumbing, our licensed Toronto plumbers have the tools and experience to safely thaw your pipes and repair any damage before it becomes a much bigger problem.
FAQ
Does dripping faucets really help prevent freezing?
Yes — a slow drip keeps water moving and helps relieve internal pressure.
How long should faucets drip after temperatures rise?
Once temperatures stay above freezing for 24 hours, it’s safe to stop dripping.
Can hot water lines freeze too?
Yes. Hot water lines cool quickly in freezing weather and should also drip during extreme cold.
Do outdoor faucets always need to drip?
Only if the supply line is still active. Winterized faucets do not need dripping.
What’s the best faucet to drip if I can only drip one?
Use the faucet farthest from the main water entry point — it helps circulate water through the longest section of the system.
Polybutylene plumbing—often referred to as Poly-B—was widely installed in homes between the late 1970s and mid-1990s. At the time, it was marketed as an affordable, flexible, and long-lasting alternative to copper. Decades later, homeowners discovered a different reality: this material ages poorly, reacts to water chemistry, and fails far more frequently than expected.
If your home was built or renovated during this period, there is a chance that this type of piping may still be hidden behind walls or under floors. Understanding the signs of Poly-B pipes, the dangers associated with them, and how to identify Poly-B plumbing can help you avoid water damage and costly emergency repairs.
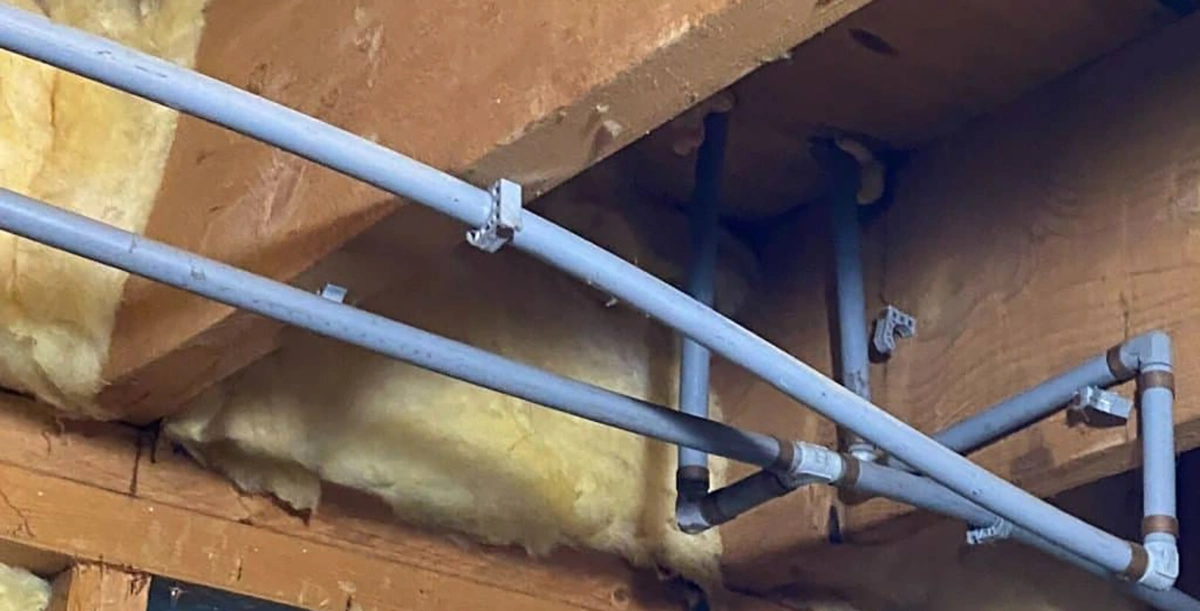
What These Pipes Are and Why They Were Used
This gray plastic piping became popular because it was cheap, flexible, and quick to install. Builders appreciated the ease of working with it, and homeowners enjoyed lower construction costs. Unfortunately, it did not perform well long term.
Exposure to chlorine, UV light, high water pressure, and poor installation practices caused many systems to degrade. Today, the material is known for its unreliability and frequent failures.
Before considering replacement, you first need to understand what Poly-B pipes look like and how to determine whether they are part of your home’s plumbing.
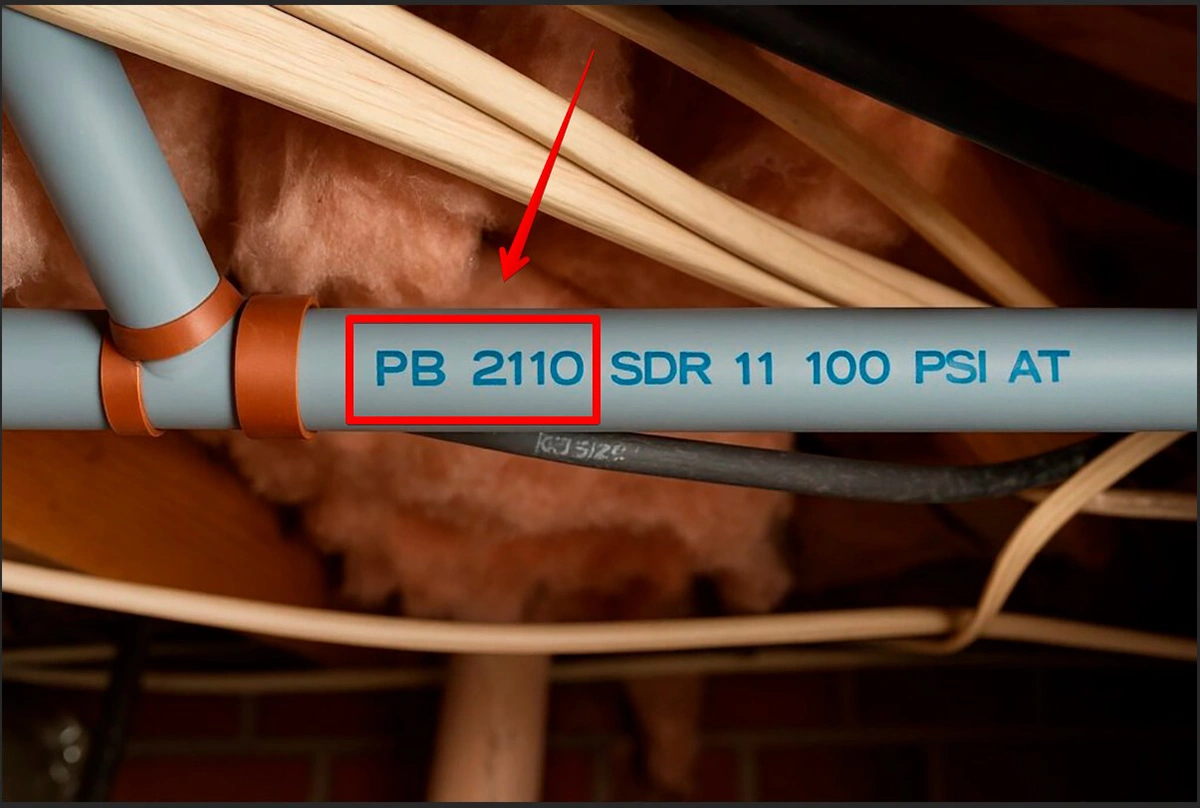
How to Identify Poly-B Piping in Your Home
Here are the simplest ways to determine whether this type of plumbing is installed in your home:
1. Look for the Distinctive Grey Color
These pipes are usually light gray—sometimes slightly bluish.
2. Check for Markings or Stamps
Common labels include:
PB or PB2110
Manufacturer names like Ipex, Vanguard, Bow, Centurion
Tankless or “on-demand” water heaters are becoming increasingly popular among homeowners seeking energy-efficient and space-saving solutions. Many homeowners research the tankless water heaters pros and cons before deciding whether this system is the right upgrade for their plumbing system. Unlike traditional systems with large storage tanks, tankless models heat water only when it’s needed — providing a continuous flow of hot water without wasting energy.
But before you invest, it’s important to understand the real tankless water heater pros and cons and how they compare to conventional models so you can evaluate the advantages and disadvantages for your home.
How Tankless Water Heaters Work
A tankless water heater uses either gas burners or electric elements to heat water instantly as it passes through the system. When you turn on a tap, cold water flows through a heat exchanger and comes out hot on demand. Since there’s no storage tank, the system doesn’t lose heat through standby energy loss — one of the main reasons these units are considered more efficient than traditional models.
Still, tankless systems have specific installation and maintenance requirements that every homeowner should consider.
Advantages of Tankless Water Heaters
1. Endless Hot Water
One of the biggest benefits of tankless water heaters is that they never run out of hot water, making this feature a key advantage for households with high hot water demand. Whether you’re taking long showers or running multiple loads of laundry, the heater keeps producing hot water continuously, as long as your system capacity matches your household’s demand.
2. High Energy Efficiency
Tankless units are designed to work only when you need hot water, which is one of the important benefits of tankless hot water heater systems for energy-efficient homes. Unlike tank-style heaters that maintain a full reservoir of hot water 24/7, a tankless system activates only when the tap is turned on. This can reduce energy consumption by up to 30% compared to traditional models — a major advantage for energy-conscious homeowners.
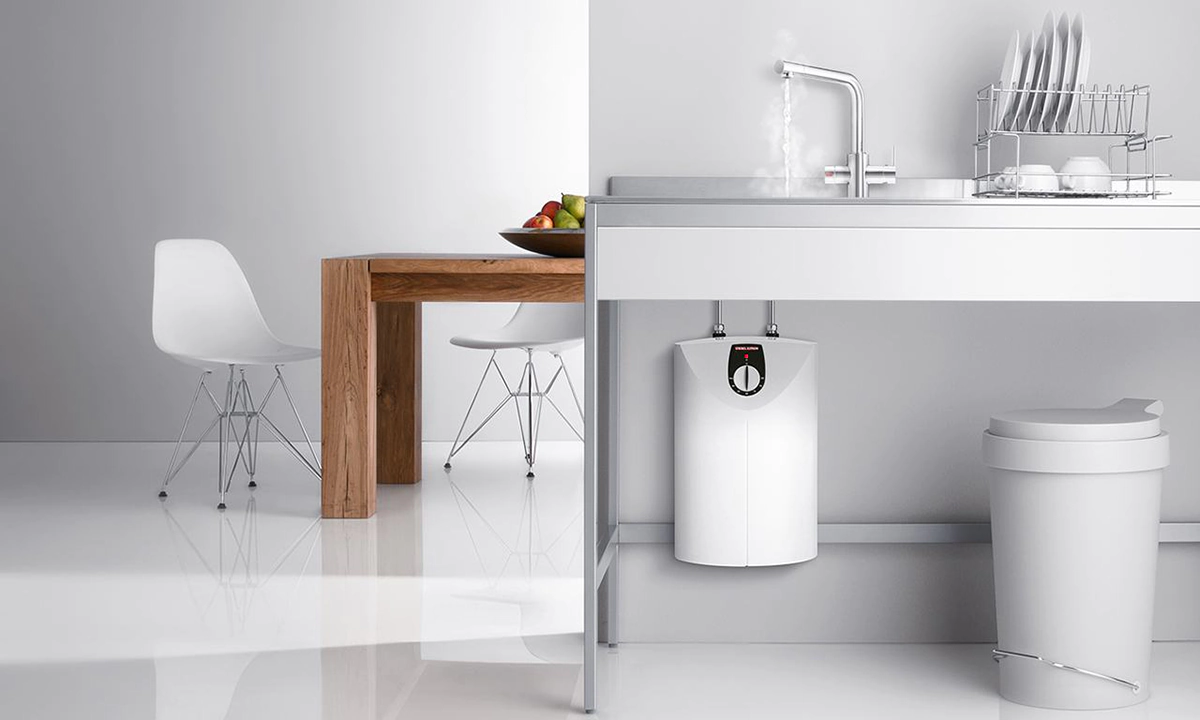
3. Space-Saving Design
Since there’s no large tank to store, a tankless model can be wall-mounted in compact spaces such as closets or utility rooms. For small homes, condos, or apartments, this space-saving benefit makes tankless water heaters an attractive option.
4. Longer Lifespan
A high-quality tankless hot water heater can last up to 20 years with proper maintenance, which is often highlighted as one of the long-term benefits of tankless water heater systems compared to traditional tanks. This longevity helps offset the higher initial investment, offering greater long-term value.
5. Lower Risk of Water Damage
Traditional tanks can sometimes rust or crack, causing leaks and costly water damage. With no storage tank, the risk of major flooding or corrosion is significantly reduced — another practical advantage of tankless water heaters.
Disadvantages of Tankless Water Heaters
1. Higher Initial Cost
The main downside of tankless water heaters is the upfront expense. Both the unit itself and its professional installation typically cost more than a conventional heater. Homes may require additional gas line or electrical upgrades, increasing the total cost.
2. Limited Flow for Multiple Outlets
While a tankless heater provides endless hot water, it can struggle when several appliances run simultaneously, which is considered one of the practical disadvantages of tankless water heater systems in large households. For instance, using two showers and a washing machine at once might cause a noticeable drop in water temperature or pressure. Larger households often need multiple units to handle peak demand effectively.
3. Professional Installation Required
Installing a tankless water heater is more complex than replacing a traditional tank. Incorrect setup can lead to poor performance or safety hazards. It’s best to have certified plumbers — such as POM Plumbing — handle installation, ensuring your system operates efficiently and meets all local codes.
4. Slight Delay in Hot Water Delivery
Because the system heats water on demand, there can be a short delay before hot water reaches the tap. Although it’s usually only a few seconds, this delay can lead to slightly higher water use over time.
5. Maintenance Needs
Tankless water heaters require regular descaling to prevent mineral buildup, especially in areas with hard water. Failing to flush the unit annually may lead to reduced efficiency and shorter lifespan. This maintenance requirement is one of the common cons of tankless water heaters that homeowners should be aware of.
Tankless vs. Traditional Water Heaters
Compared to traditional tank systems, tankless water heaters are more energy-efficient, compact, and durable. However, they come at a higher initial cost and may not meet heavy, multi-outlet demand without upgrades.
Traditional tank heaters are cheaper to install and can supply multiple fixtures simultaneously, but they take up more space, waste energy through heat loss, and require replacement more frequently.
In short, if your priority is efficiency, longevity, and unlimited hot water, a tankless model is a smart long-term investment. If you’re looking for affordability and simplicity, a traditional tank might still fit your needs.
Tankless vs Traditional Water Heater Comparison
Feature
Tank Water Heater
Tankless Water Heater
Energy efficiency
Moderate
High
Lifespan
10–12 years
Up to 20 years
Hot water supply
Limited
Continuous
Space requirements
Large tank
Compact wall unit
Upfront cost
Lower
Higher
Are Tankless Water Heaters Worth It?
For many homeowners, the pros of tankless water heaters — including energy savings, compact design, and endless hot water — outweigh the disadvantages. However, if you have a large household or limited installation budget, the cons such as cost and flow limitations may be important considerations.
Before making a final decision, it’s best to consult with professionals like POM Plumbing, who can assess your water usage, recommend the right size, and install your new heater safely and efficiently.
Final Thoughts
Tankless water heaters represent a modern, eco-friendly upgrade for homeowners tired of running out of hot water or wasting energy, but understanding the tankless water heater pros cons helps determine if this system fits your household needs. While they do have installation and maintenance challenges, their performance, efficiency, and durability make them a worthy investment for most homes.
If you’re considering switching to a tankless hot water heater, contact POM Plumbing for expert consultation and installation across Toronto and the GTA.
Frequently Asked Questions
How long does a tankless water heater usually last?
A quality tankless water heater can last around 20 years or more with regular maintenance. This is nearly twice the lifespan of most traditional tank-style heaters. Flushing the system annually and using a water softener in areas with hard water can significantly extend its service life.
Do tankless water heaters work during a power outage?
Electric tankless water heaters require electricity to operate, so they won’t function during an outage. Gas-powered models may still need electricity for ignition and control systems. If power reliability is a concern, consider installing a small backup generator or battery system.
Can I replace my traditional water heater with a tankless system easily?
In most cases, switching to a tankless water heater requires professional modification to your home’s plumbing, venting, or gas lines. Because of the higher heating capacity, proper installation is essential for safety and performance. Certified plumbers like POM Plumbing can evaluate your setup and handle the conversion smoothly.
How often do tankless water heaters need maintenance?
Maintenance should be done at least once a year. The process includes flushing mineral deposits, cleaning filters, and checking burners or electrical components. Regular service prevents scale buildup and ensures your system maintains optimal efficiency and water pressure.
Are tankless water heaters suitable for large families?
Yes, but only if properly sized. Large households may need either a high-capacity tankless unit or multiple systems working in parallel. A professional plumber can calculate your peak water demand and recommend the right setup to ensure a steady hot water supply for everyone.
What type of water heater is best — gas or electric tankless?
Both have advantages. Gas tankless water heaters heat water faster and handle higher flow rates, making them ideal for large homes. Electric models are easier to install, more compact, and require less maintenance but may struggle with multiple fixtures in use. Your home’s infrastructure and energy costs often determine the best option.
Do tankless water heaters increase home value?
Yes. Many homebuyers see tankless systems as a modern, energy-efficient upgrade. They can slightly raise property value and make your home more appealing on the market, especially if paired with other eco-friendly improvements.
A water pressure tank plays a critical role in keeping your home’s water system running smoothly. It stores pressurized water from your well or main supply and helps maintain consistent water pressure. When the pressure tank is not filling up with water or there’s no pressure in the water tank, it can interrupt your daily water use and signal underlying mechanical issues.
Understanding what causes these water pressure tank problems and other common pressurized water tank problems and how to fix them can save you from costly repairs and downtime.
Common Signs of Water Pressure Tank Problems
Before troubleshooting, it’s important to recognize the signs of trouble in your system. You may have a pressurized water tank problem if you notice:
Faucets spitting air or fluctuating water flow
The well pump cycling on and off too frequently
Water pressure dropping suddenly
No water coming from taps at all
Each of these symptoms points to different pressure tank problems, including common well pressure tanks problems, that can develop over time due to leaks, low air charge, or internal damage.
Why Your Pressure Tank Is Not Filling with Water
When there’s no water in your pressure tank, it means the system isn’t maintaining the proper balance between water and air. Here are the most common causes.
1. Faulty Pressure Switch
The pressure switch controls when the well pump turns on and off. If it fails or becomes clogged with debris, the pump won’t activate — leaving the pressure tank empty.
Fix: Check the switch contacts for corrosion or dirt, clean them gently, and replace the switch if it no longer responds to pressure changes.
2. Broken or Failing Well Pump
If your well pressure tank is not filling at all, the pump itself could be at fault. A burned-out motor, damaged impeller, or broken wire may stop it from drawing water.
Fix: Listen for the pump when you turn on a faucet. If you hear no sound, test the circuit breaker or contact a licensed plumber to inspect the pump.
3. Air Charge or Bladder Failure
Inside most water pressure tanks is a rubber bladder or diaphragm that separates air from water. Over time, this bladder can rupture, causing no pressure in water pressure tank and other serious water tank pressure problems.
Fix: Tap the outside of the tank — a hollow sound on top and a dull thud on the bottom is normal. If it sounds solid throughout, the bladder is likely waterlogged and must be replaced.
Water Tank No Pressure but Pump Runs
If the pump is running but you still have no pressure in your water tank, several issues may be to blame.
1. Clogged Intake or Pipe Blockage
Sediment buildup or mineral scaling can restrict water flow into the tank. This is common in older well systems.
Fix: Inspect the intake pipe and filters for debris. Flushing the lines or replacing a clogged filter can restore flow.
2. Check Valve or Foot Valve Malfunction
These valves prevent water from flowing backward into the well. When they fail, water drains out of the tank each time the pump stops, leading to no water pressure when you turn on a tap.
Fix: Have a plumber test and replace any faulty check or foot valves to prevent backflow.
3. Incorrect Pressure Setting
If the cut-in and cut-out pressures are not calibrated correctly, the system may not build sufficient pressure.
Fix: The cut-in pressure (when the pump starts) is usually 2 psi below the tank’s air charge. Adjusting the settings properly ensures smooth operation.
Other Common Water Pressure Vessel Problems
Not all water pressure tank troubleshooting or well water pressure tank troubleshooting is about the pump or switch.
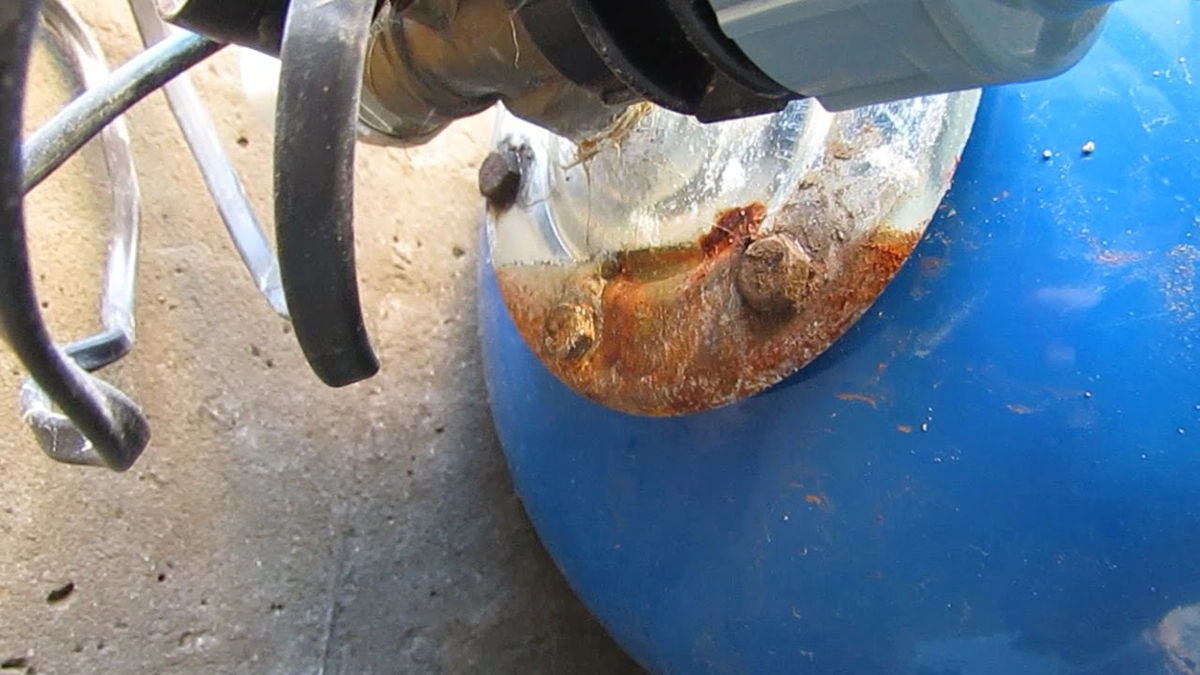
1. Internal Corrosion or Rust
Metal tanks can corrode internally, especially if used with hard water or without protective coatings. This leads to leaks and loss of pressure.
Fix: Replace severely corroded tanks and install a water softener or filtration system to reduce mineral buildup.
2. Leaking Connections or Fittings
Loose joints, cracked pipes, or worn seals around the tank can cause water tank pressure problems and air leaks that reduce performance.
Fix: Tighten or reseal fittings and replace damaged parts immediately to prevent pressure loss.
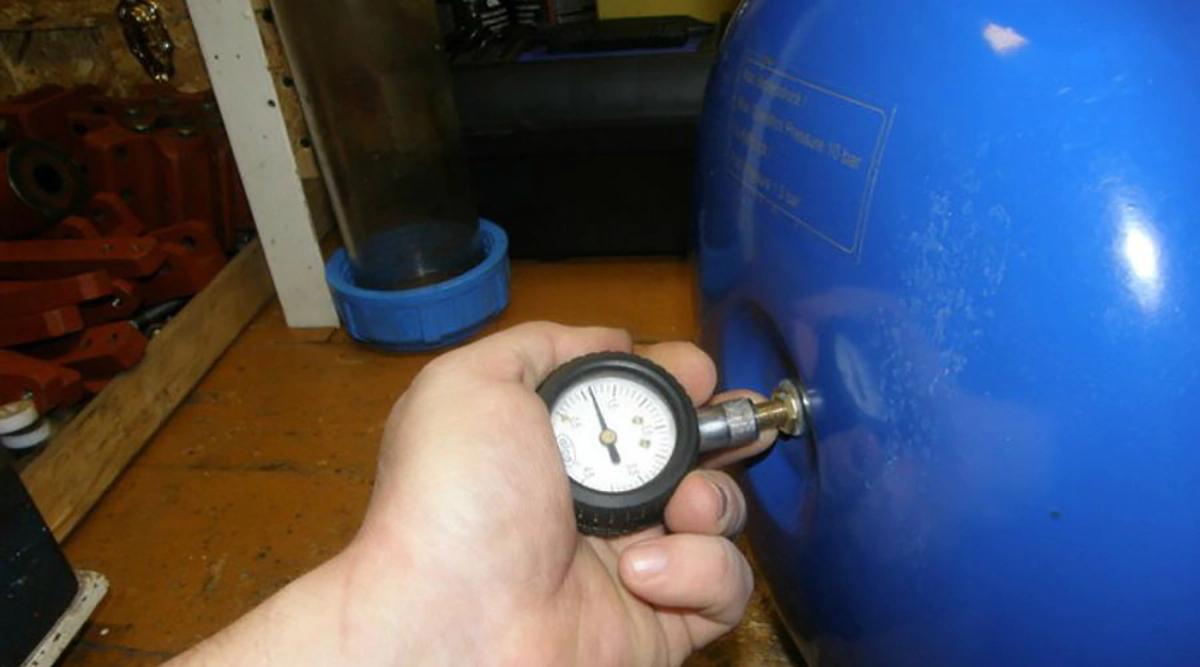
3. Faulty Pressure Gauge
Sometimes the issue isn’t with the system but with the gauge itself showing incorrect readings.
Fix: Compare gauge readings with actual pressure using a tire gauge on the air valve. If the numbers differ significantly, replace the faulty gauge.
How to Troubleshoot Water Pressure Tank Problems Safely
Before performing any water tank troubleshooting or advanced water pressure tank troubleshooting, always turn off the power to the pump. Then follow these steps:
Check the air pressure in the tank using a standard air gauge.
Verify that the pressure switch is functioning and set to the correct range.
Inspect all fittings and valves for leaks or rust.
Drain the tank and refill it to check whether it’s holding pressure properly.
If the tank fails to build pressure after refilling, call a professional plumber for diagnosis.
Attempting to repair electrical or well pump components without experience can cause further damage or pose safety risks.
When to Call a Professional Plumber
Minor water pressure tank problems can sometimes be fixed with cleaning or adjustment, but recurring pressure drops, electrical faults, or no water in the pressure tank require expert help.
Licensed technicians like POM Plumbing specialize in well water pressure tank troubleshooting and can quickly identify whether the problem is mechanical, electrical, or structural. They’ll inspect your system, replace faulty components, and ensure safe, code-compliant operation.
Final Thoughts
A pressure tank not filling up with water isn’t just an inconvenience — it’s a sign that your water system needs attention. From air bladder failure to faulty switches or pump issues, diagnosing the cause early can prevent serious damage.
If you’re dealing with low pressure, no water, or constant pump cycling, don’t ignore the warning signs. Contact POM Plumbing for professional water pressure tank troubleshooting across Toronto and the GTA. Their experts will restore consistent pressure, extend your tank’s lifespan, and keep your home’s water system running reliably.
Frequently Asked Questions
How long should a water pressure tank last?
A well-maintained water pressure tank typically lasts between 10 and 15 years. However, the lifespan can vary depending on water quality, usage, and tank type. Tanks in areas with hard water or high mineral content may corrode faster. Regular inspections and pressure checks help extend the service life.
What happens if a pressure tank loses air?
When a pressure tank loses air, it can’t maintain proper pressure balance. The pump will start cycling on and off frequently — a condition known as “short cycling.” This increases wear on the pump motor and can eventually lead to failure. Recharging the air or replacing a damaged bladder usually solves the issue.
Can a pressure tank work without a bladder?
Older-style tanks didn’t use bladders, but modern pressurized water tanks rely on them to separate air from water. If the bladder ruptures or fails, the air mixes with water, leading to pressure loss and waterlogging. Replacing the bladder or the entire tank is the best long-term solution.
Why does my water pressure fluctuate constantly?
Constant water pressure fluctuations usually mean that the pressure switch or check valve is malfunctioning. Inconsistent power supply to the well pump can also cause pressure swings. A plumber can test these components and reset the cut-in/cut-out levels to stabilize your system.
Is it safe to keep using a water tank with low pressure?
No. Operating a system with low water pressure can overwork your pump and cause further damage. It may also indicate leaks or air loss inside the tank. The sooner you troubleshoot or call a professional, the less likely you’ll face pump burnout or contamination from backflow.
How do I check if my pressure tank is waterlogged?
Turn off the pump and tap the tank gently from top to bottom. A healthy tank sounds hollow at the top and solid at the bottom. If it sounds solid all over or feels unusually heavy, it’s likely waterlogged — meaning the bladder has failed or too much water has filled the chamber.
Who should I call if my well pressure tank stops working?
If your well water pressure tank isn’t filling or holding pressure, contact a licensed plumber like POM Plumbing. Professionals have the tools to safely test the switch, pump, and tank components, locate leaks, and restore consistent water pressure without risking electrical or mechanical damage.
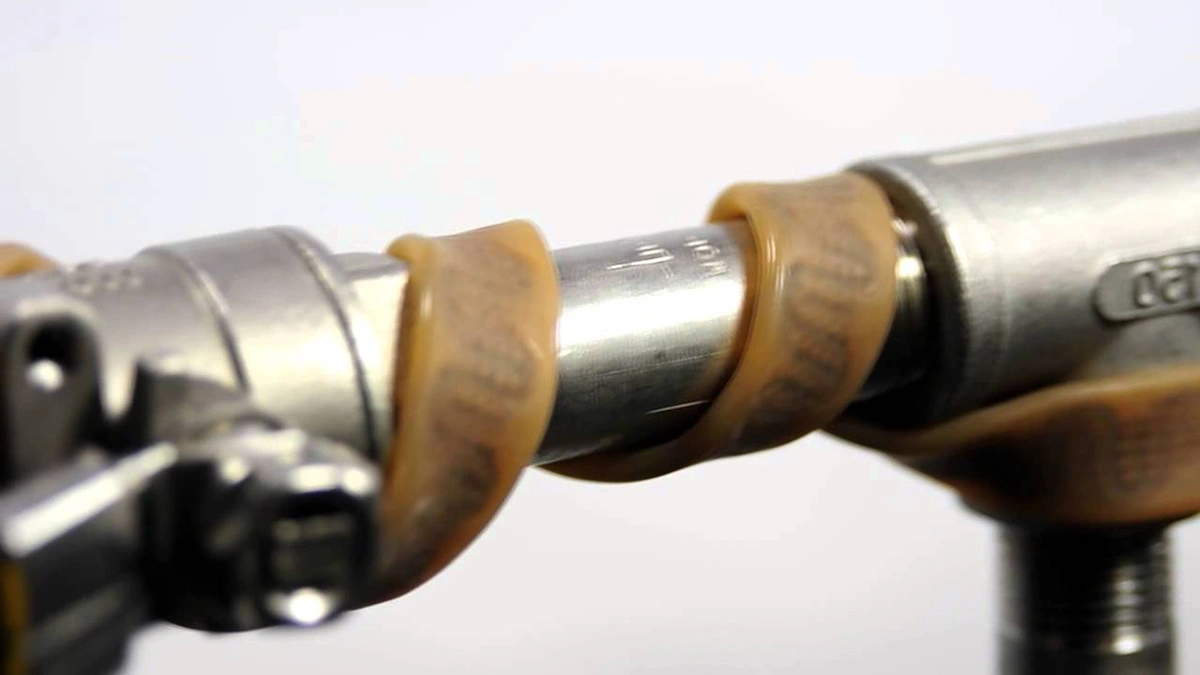
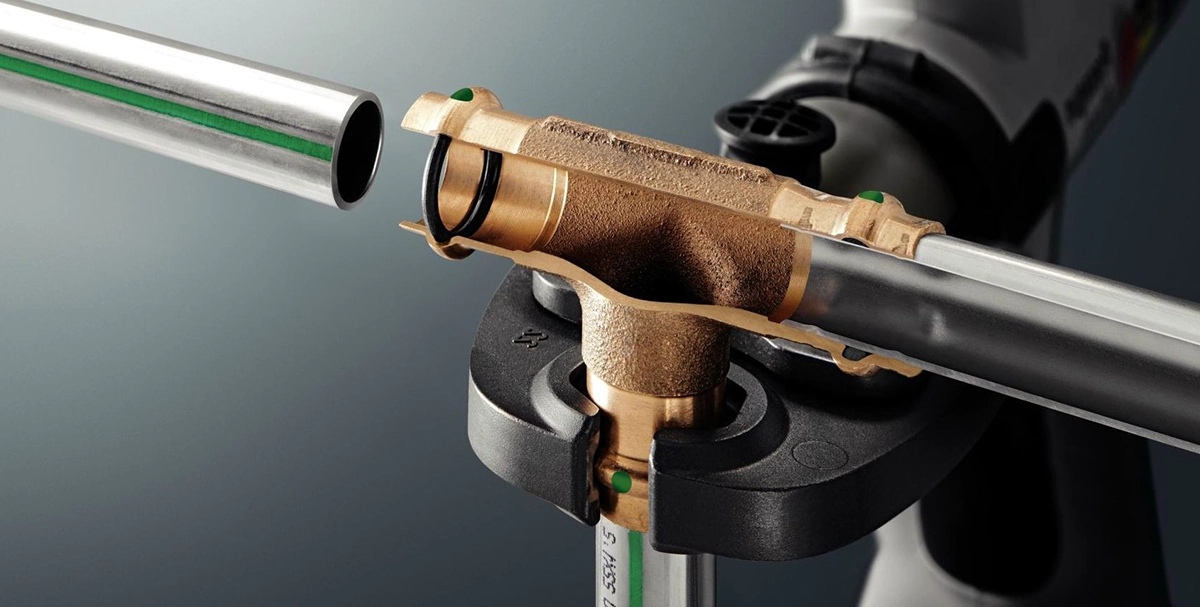
Modern plumbing has come a long way from traditional soldering and threading methods. One of the most innovative technologies used today is the ProPress fitting system — a fast, reliable, and clean way to connect pipes without using open flames or messy materials. Whether you’re working with copper, black, or gas pipes, ProPress fittings are changing how professional plumbers in Canada handle installations and repairs.
What Is a ProPress Fitting?
A ProPress fitting is a mechanical connection system designed to join pipes quickly and securely using a pressing tool instead of soldering or welding.
Developed by Viega, the system relies on stainless-steel or copper fittings that feature a built-in sealing element (often EPDM or HNBR). When pressed, the tool permanently deforms the fitting around the pipe, creating a watertight and airtight seal.
Unlike traditional solder joints that require heat, flux, and drying time, ProPress plumbing fittings are installed cold — which means faster and safer work, especially in residential and commercial buildings where open flames could be risky.
How ProPress Fittings Work
The working principle behind ProPress pipe fittings is simple but extremely effective. Each fitting has a specially designed groove and sealing ring. When the pressing tool’s jaws clamp around it, the fitting compresses tightly onto the pipe, locking the seal in place. This compression ensures:
A permanent mechanical connection
No need for drying or cooling time
Resistance to vibration and mechanical stress
Excellent performance under pressure
Because no soldering or welding is needed, plumbers can even make connections in wet conditions — a huge advantage during maintenance or emergency repairs.
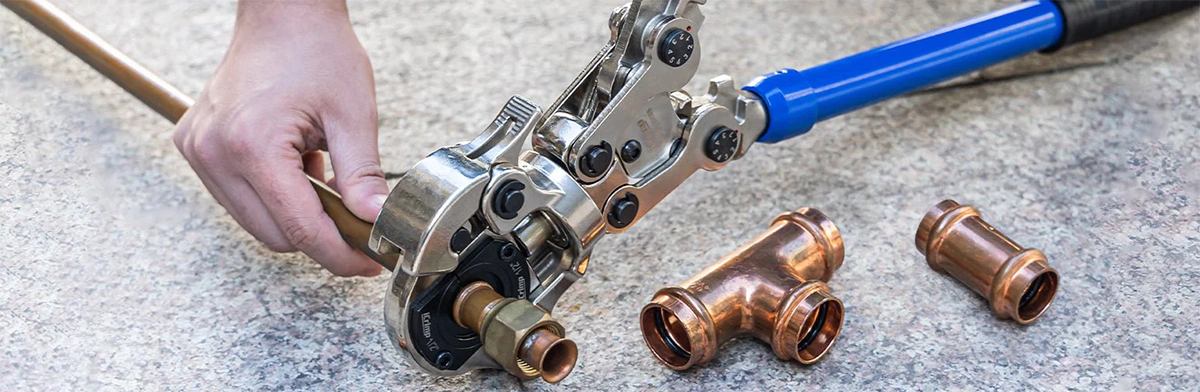
Main Types of ProPress Fittings
Different piping materials and applications require different types of ProPress systems. Here are the most common ones used in Canada:
1. ProPress Copper Fittings
These are the most widely used and recognized fittings in plumbing systems. ProPress copper pipe fittings are ideal for potable water, heating, and cooling lines. They offer:
Corrosion resistance
Long service life
Compatibility with standard copper tubing
Clean, professional look for visible installations
Because they don’t require flame soldering, ProPress copper fittings are safer to install in finished spaces or near combustible materials.
2. ProPress Fittings for Gas Lines
Specially engineered ProPress gas fittings use yellow HNBR seals designed to handle natural gas and propane. These are identified as ProPress G fittings. They are suitable for:
Residential and commercial gas lines
Industrial gas distribution
Retrofitting or replacing threaded black pipe systems
With ProPress fittings for gas, plumbers can connect lines faster and reduce leak risks associated with traditional threaded joints.
3. ProPress Black Pipe Fittings
For more robust or industrial applications, black pipe ProPress fittings provide high-strength, flame-free connections for steam, compressed air, or oil lines.
ProPress black pipe fittings eliminate the need for threading heavy steel pipe, saving time and reducing tool wear. They also maintain excellent resistance to high pressure and temperature changes.
Advantages of Using ProPress Fittings
The popularity of ProPress plumbing fittings continues to grow because they offer numerous benefits over conventional methods:
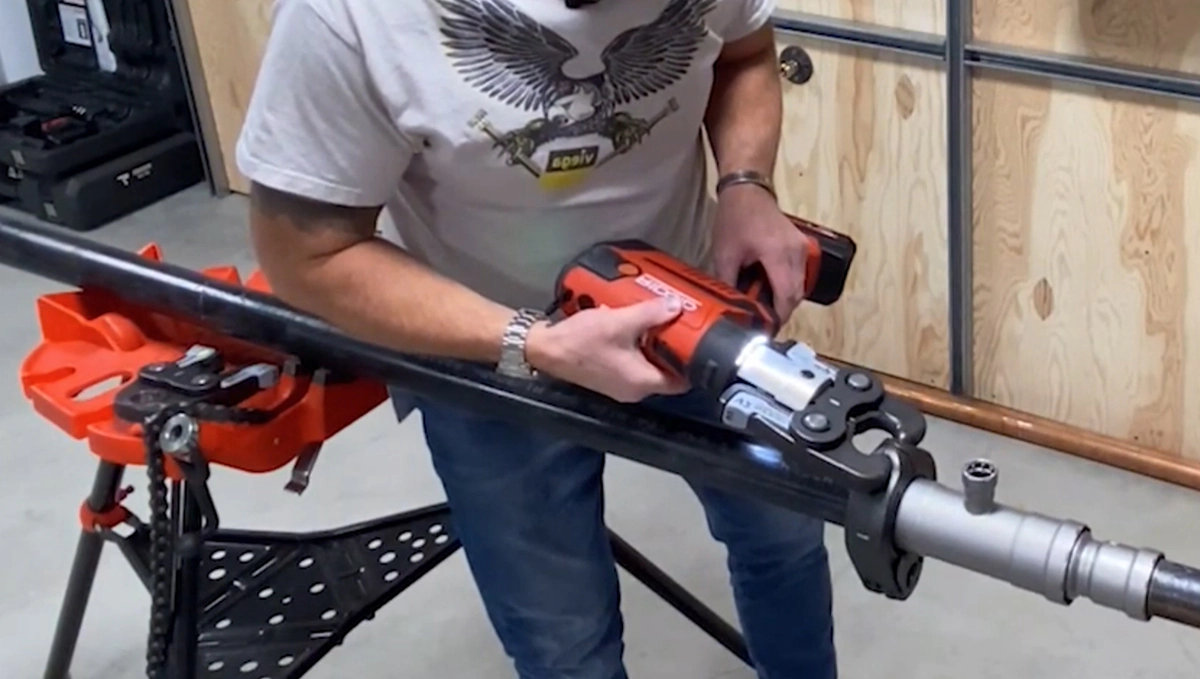
1. Speed and Efficiency
A traditional soldered joint may take several minutes to prepare, clean, heat, and cool. With ProPress pipe fittings, connections are completed in seconds — ideal for large installations or tight deadlines.
2. Safety on the Job
Because no flame or flux is required, ProPress fittings eliminate fire hazards. This makes them perfect for hospitals, schools, and commercial sites where open-flame work is restricted.
3. Reliability and Durability
When pressed correctly, ProPress copper fittings create a consistent, long-lasting seal resistant to corrosion, pressure changes, and vibration. Each fitting is tested to meet strict North American plumbing standards.
4. Versatility
From ProPress fittings for gas to ProPress black pipe fittings, the system covers virtually every type of piping — copper, stainless, carbon steel, and more. That’s why professional plumbers across Canada rely on it for everything from water lines to industrial gas systems.
Common Applications in Canada
ProPress fittings in Canada are widely used in residential, commercial, and industrial plumbing. Some of the most frequent applications include:
Domestic hot and cold water systems
Hydronic heating and cooling
Natural gas and propane installations
Fire sprinkler and compressed air systems
Industrial fluid transfer lines
Because the technology minimizes downtime and clean-up, it’s ideal for retrofits in condos, office towers, and public buildings.
How Long Do ProPress Fittings Last?
When properly installed, ProPress copper pipe fittings can last 50 years or more. The combination of strong mechanical connection and corrosion-resistant materials ensures long service life with minimal maintenance.
Regular inspection and pressure testing during installation help guarantee a leak-free system that performs reliably for decades.
Can ProPress Fittings Leak?
Although ProPress fittings are extremely reliable, leaks can occur if:
The pipe wasn’t cleaned or deburred properly before pressing
The fitting was not fully inserted
The press tool wasn’t calibrated or aligned correctly
Professional plumbers, like the experts at POM Plumbing, use certified equipment and follow manufacturer standards to prevent such issues. Each joint is pressure-tested after installation to ensure a perfect seal.
Why Choose ProPress Fittings for Your Plumbing Project
Whether you’re replacing a water line, upgrading gas pipes, or modernizing an old heating system, ProPress plumbing fittings offer speed, safety, and long-term reliability.
They are an investment in quality workmanship — one that pays off through fewer leaks, shorter installation times, and lower maintenance costs.
For homeowners and contractors alike, POM Plumbing provides expert installation of ProPress pipe fittings across Toronto and the GTA. Our licensed plumbers work with copper, gas, and black pipe systems, ensuring every joint is secure, compliant, and built to last.
Final Thoughts
The ProPress fitting system represents the future of plumbing — clean, efficient, and professional. It replaces outdated soldering methods with a safer and faster alternative that maintains exceptional strength and performance.
If you need reliable installation or repair using ProPress fittings in Canada, contact POM Plumbing today. Our specialists will help you choose the right solution for your copper, gas, or black pipe system and guarantee results that stand the test of time.
Frequently Asked Questions
Can ProPress fittings be used on existing plumbing systems?
Yes. ProPress fittings are ideal for both new installations and retrofits. Plumbers can easily connect ProPress copper pipe fittings to existing copper lines by cleaning the pipe and pressing on the new fitting — no need to drain the entire system or use a torch. This makes them perfect for repairs in occupied homes or commercial spaces.
Are ProPress fittings suitable for outdoor or underground use?
ProPress fittings can be used outdoors if properly protected from moisture, UV exposure, and soil contact. However, for underground installations, additional corrosion protection or specific underground-rated fittings should be used. Always follow local Canadian plumbing codes to ensure compliance and longevity.
Can ProPress fittings be reused after removal?
No. Once a ProPress fitting has been crimped, it cannot be reused. The pressing process permanently deforms the metal around the pipe, and removing it compromises the seal. If you need to modify a line, the old fitting must be cut off and replaced with a new one.
What kind of tools are required to install ProPress fittings?
To install ProPress plumbing fittings, plumbers use a hydraulic or battery-powered press tool equipped with the correct jaw size. The tool applies precise pressure to compress the fitting onto the pipe. Using certified tools is crucial for maintaining a watertight and gas-tight connection that meets manufacturer specifications.
How do I know if a ProPress fitting has been properly pressed?
Many ProPress pipe fittings come with a “Smart Connect” feature — a small leak path that allows unpressed connections to drip slightly during pressure testing. This alerts plumbers to any missed joints before the system goes live. Once pressed, the leak stops instantly, confirming a secure connection.
Are ProPress fittings safe for gas lines?
Yes. ProPress fittings for gas (known as ProPress G) are specifically designed for natural gas and propane systems. They use yellow HNBR seals that resist gas and high temperatures. These fittings are approved for use across Canada under local gas codes, provided installation follows manufacturer instructions.
What is the pressure rating for ProPress fittings?
Depending on pipe size and material, ProPress copper fittings can handle up to 200–300 PSI for water systems and up to 150 PSI for gas. This makes them suitable for residential plumbing, hydronic heating, and many commercial applications. Always verify pressure ratings based on the specific product type and system design.
How do ProPress fittings compare to soldering or threading?
ProPress plumbing fittings offer faster installation, no flames, and fewer leak risks compared to soldering or threading. While soldering requires heating and cooling time, pressing takes only seconds. Threading heavy steel pipe also demands more labor and tools. ProPress simplifies all of that while maintaining durability and code compliance.
What maintenance do ProPress systems require?
Once installed correctly, ProPress pipe fittings need minimal maintenance. Routine inspection for external corrosion, especially in humid or chemical environments, is recommended. Systems should also be pressure-tested annually in commercial or industrial applications to ensure long-term reliability.
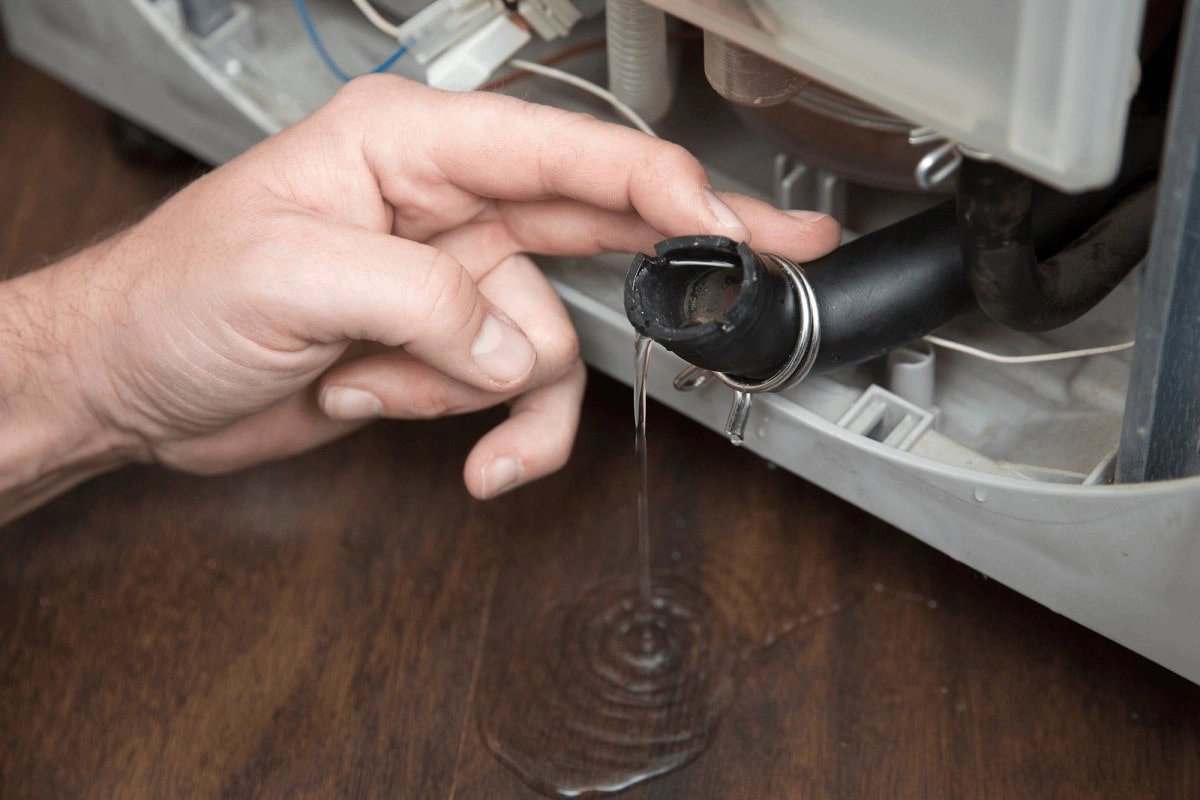
A leaking dishwasher is one of those home problems that can start small and quickly turn into something serious. Whether you notice your dishwasher dripping during a cycle or find a puddle underneath it, leaks can damage flooring, cause mold growth, and even lead to electrical issues. Understanding why your dishwasher leaks and how to address the problem will help you prevent expensive repairs and extend the lifespan of your appliance.
1. Diagnosing the Problem: Where the Leak Comes From
When a dishwasher is leaking from underneath or the dishwasher door is leaking at the bottom, it’s essential to determine the exact source before making any repairs. The most common leak areas include:
The door and gasket area
The bottom of the unit
The connections behind or beneath the appliance
Internal components like hoses or valves
To identify the cause, start by running a short cycle and observing the leak’s location. If the dishwasher is leaking from the bottom, the problem may involve internal seals or the drain system. If the dishwasher leaks from the door, the door gasket or alignment may be to blame.
2. Faulty or Worn Door Gasket
One of the most frequent leaking dishwasher causes is a worn or cracked door gasket. This rubber seal prevents water from escaping during the wash cycle. Over time, the gasket can lose flexibility or develop gaps, allowing moisture to escape along the door edges or bottom.
How to fix it:
Inspect the gasket for cracks or stiffness.
Clean away grease or food particles that might prevent a proper seal.
If the gasket looks worn or brittle, replace it—it’s a simple and inexpensive repair most homeowners can do.
When the dishwasher door leaks at the bottom, a damaged gasket is almost always the first thing to check.
3. Misaligned Door or Loose Latch
Even a perfectly good gasket can’t seal a door that isn’t closing correctly. If you notice your dishwasher leaking from the door, the latch or hinges might be loose or bent. Misalignment causes uneven pressure on the seal, letting water escape during high-pressure rinse cycles.
Fix:
Open and close the door to feel if it latches firmly.
Tighten the latch screws if they’re loose.
If the latch mechanism is worn, replace it to restore full door pressure. A misaligned door might also occur if the dishwasher isn’t level, which can cause dripping water toward one corner of the door.
4. Blocked or Overfilled Dishwasher
If you’ve ever wondered why my dishwasher is leaking even though the door is fine, the problem might be inside the tub. Overloading dishes or blocking the spray arms can cause water to splash toward the door seal and escape.
Common issues include:
Loading too many items near the bottom rack.
Food debris clogging the spray arms.
Using too much detergent, creating excessive suds and overflow.
Fix:
Keep the spray arms clear.
Avoid overloading and ensure large dishes don’t block spray rotation.
Use the correct detergent for your model.
In many cases, a dishwasher that’s dripping water isn’t broken—it’s simply being overfilled or overloaded.
5. Cracked Hoses and Loose Connections
When a dishwasher is leaking from underneath, the culprit is often a cracked or loose hose. The drain and inlet hoses carry water in and out of the appliance, and any wear or improper connection can result in a slow but persistent drip.
How to inspect:
Turn off the power and pull the dishwasher slightly forward.
Check all visible hoses for cracks, mineral buildup, or loose clamps.
Tighten fittings and replace damaged hoses.
If left untreated, these small leaks can worsen and even cause a dishwasher leaking in the basement if the water seeps through the flooring.
6. Damaged Pump or Seal
Another frequent cause of a dishwasher leaking from bottom is a worn pump seal. The pump circulates and drains water during each cycle, and its rubber seals are prone to deterioration over time.
Symptoms:
Dripping directly beneath the center of the appliance.
Water pooling after the drain cycle.
Unusual grinding or humming noises.
Solution: Replacing a pump or its seal is more technical than replacing a hose. If you suspect this issue, it’s best to call professional plumbers or appliance technicians like POM Plumbing, who can identify the exact part failure and perform a safe replacement.
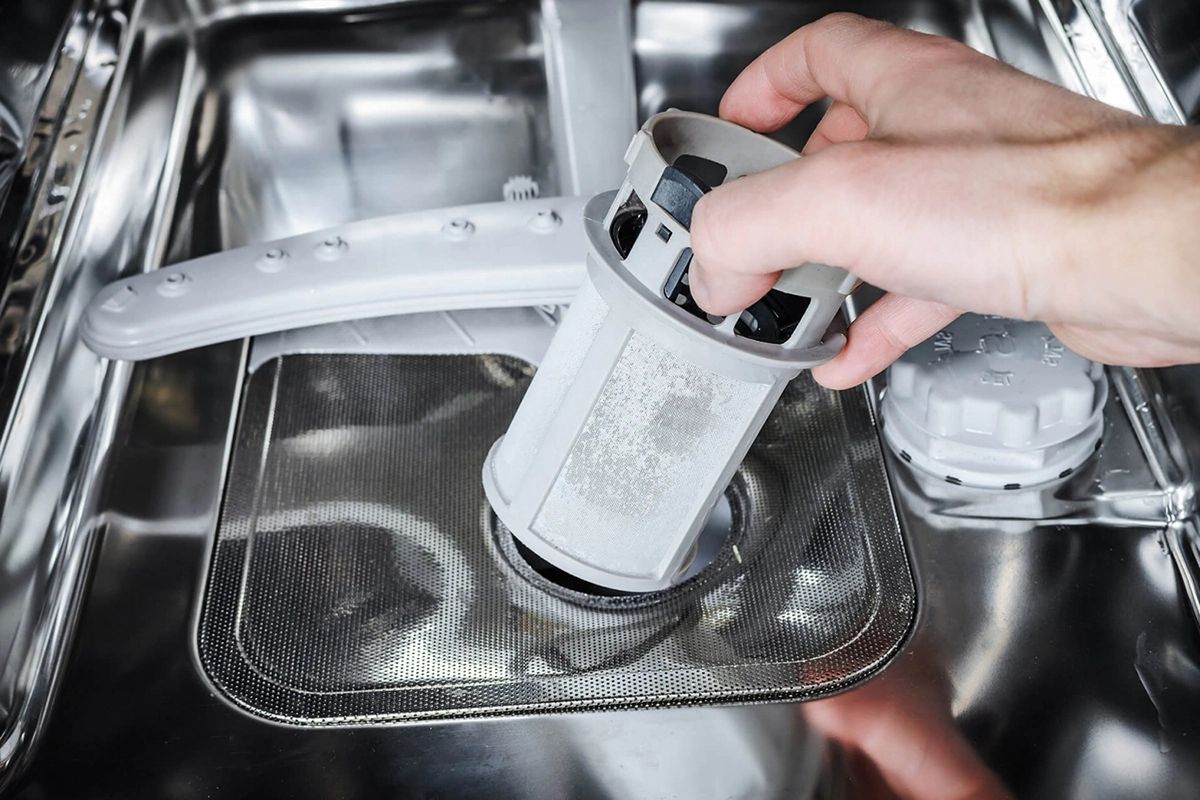
7. Clogged Filter or Drain System
A clogged drain system can also lead to leaks. When the filter or drain hose becomes blocked with grease, food, or debris, the dishwasher cannot empty properly. This forces water to back up inside the tub, eventually leaking from seams or the bottom.
How to fix it:
Remove and clean the filter at the base of the unit.
Check the drain hose for kinks or buildup.
Run a cleaning cycle with dishwasher cleaner or vinegar to clear internal buildup.
If the dishwasher leaks when not in use, residual water trapped in the drain hose may slowly seep out through these clogs.
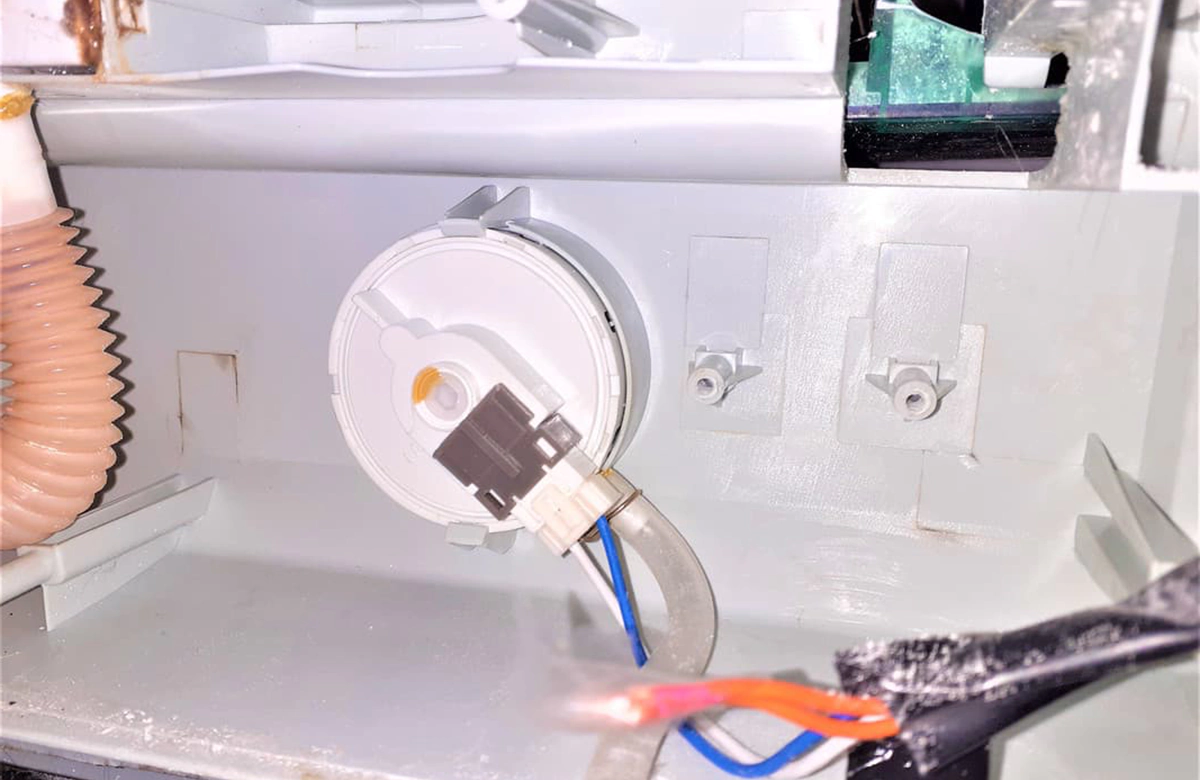
8. Faulty Float Switch or Inlet Valve
The float switch regulates how much water enters the dishwasher. If it fails, the machine can overfill and spill from the bottom. Similarly, a malfunctioning inlet valve might continue to let water in even after the tub is full, leading to an overflow situation.
Fix:
Open the dishwasher mid-cycle and check if water levels are higher than normal.
Ensure the float moves freely and isn’t jammed by debris.
Replace a faulty float switch or inlet valve as needed.
These electrical components can sometimes cause dishwasher leaking water when not in use, especially if the valve doesn’t close fully.
9. Internal Tub Damage
Though less common, cracks in the internal tub can cause dishwasher leaks from underneath. These cracks might develop in older models or when sharp utensils puncture the lining.
What to do:
Inspect the bottom and sides of the tub with a flashlight.
Small cracks may be sealed with special dishwasher-safe epoxy.
If the tub is severely damaged, replacement is usually the most reliable long-term solution.
10. Professional Repair or Replacement
When the above steps don’t solve the issue, the problem may involve multiple components. At this point, many homeowners ask, “Can a leaking dishwasher be repaired?” — and in most cases, the answer is yes. A skilled technician can replace gaskets, valves, or hoses at a fraction of the cost of a new appliance.
However, if the unit is more than 10 years old or repairs exceed half the price of a replacement, investing in a new dishwasher may be more practical.
Professional services like POM Plumbing specialize in diagnosing and repairing dishwasher leaks safely and efficiently. Their experts can quickly determine the reasons a dishwasher leaks, fix the problem, and help you prevent future issues through proper installation and maintenance.
Final Thoughts
A leaking dishwasher shouldn’t be ignored. Even a slow dishwasher dripping water can lead to long-term floor damage, mold growth, or electrical hazards. Regular cleaning, correct loading, and prompt maintenance are the best defenses against leaks.
If you notice your dishwasher leaking from the bottom, dripping from the door, or pooling water in the basement, don’t wait for the damage to worsen. Contact POM Plumbing for professional diagnosis and repair. Their team provides reliable solutions for homeowners across Toronto and the GTA, ensuring your kitchen stays safe, dry, and fully functional.
Frequently Asked Questions
Why is my dishwasher leaking from the bottom?
A dishwasher leaking from the bottom is often caused by a worn pump seal, loose hose clamp, or blocked drain line. As the dishwasher runs, high-pressure water circulates through the pump, and any weak point allows moisture to escape underneath the unit. In some cases, mineral buildup around the drain pump or a cracked sump housing can also be responsible. The best way to confirm the source is to remove the bottom panel and check for moisture after a short cycle. If you’re unsure, contact a licensed technician who can pressure-test the seals and inspect for internal damage.
Why is my dishwasher dripping water when it’s not running?
If you notice your dishwasher dripping water when not in use, the inlet valve is likely defective or stuck partially open. This valve controls the water supply, and if it fails, a slow trickle can fill the base pan even when the machine is off. In some cases, high water pressure in your home can also force a small backflow into the dishwasher line. To fix this, shut off the water supply and observe whether the dripping stops. If it does, replacing the inlet valve will solve the issue. Installing a water hammer arrestor or pressure regulator may also prevent future leaks caused by pressure surges.
Can a leaking dishwasher be repaired, or should it be replaced?
In most cases, a leaking dishwasher can be repaired, especially if the issue involves gaskets, hoses, or valves. These are affordable components that can be replaced quickly. However, if the leak comes from the stainless-steel or plastic tub itself, repairs are rarely permanent. If your dishwasher is more than 10 years old or the repair cost exceeds half the price of a new model, replacement is the better long-term option. A plumbing professional can evaluate whether the leak is mechanical or structural and recommend the most cost-effective solution.
What are the most common reasons a dishwasher leaks?
The most frequent reasons a dishwasher leaks include a damaged door seal, loose or cracked hoses, worn pump gaskets, detergent overuse, and blocked drains. Improper installation, such as an unlevel dishwasher or a kinked drain hose, can also cause leaks to appear over time. Even something as simple as using too much dish soap can lead to suds overflow, forcing liquid out through vents and seals. Regular maintenance, proper loading, and professional inspection every few years can help avoid these issues.
Is it safe to use a dishwasher that’s leaking slightly?
No — running a dishwasher that’s dripping or leaking slightly is not safe. Even small amounts of moisture under the unit can reach electrical components, increasing the risk of short circuits or corrosion. Water can also seep into flooring, baseboards, or cabinets, leading to mold growth. If you notice any leak, unplug the dishwasher, turn off the water supply, and investigate the source. Continuing to use a leaking appliance can turn a simple repair into a much larger restoration job.
My dishwasher is leaking from underneath — what should I do first?
When your dishwasher is leaking from underneath, start by disconnecting power and water supply to avoid electrical hazards. Gently pull the appliance forward and look for visible moisture near the pump, hose joints, or floor pan. If you see standing water, dry it completely and then run a short cycle while observing the area. This will help you pinpoint whether the leak occurs during filling, washing, or draining. Document what you see — that information helps professionals like POM Plumbing diagnose the problem faster and recommend the right repair.
Why is my dishwasher leaking in the basement below the kitchen?
A dishwasher leaking in the basement usually means that water from a kitchen leak is seeping through gaps in the subfloor or plumbing cutouts. Persistent leaks under the dishwasher can travel along the cabinet base and drip down to the lower level, appearing as ceiling stains or moisture patches. This kind of leak can be serious because it often goes unnoticed until damage is significant. Fixing the dishwasher at its source is the first step, followed by checking for drywall or insulation moisture in the basement to prevent mold or rot.
Seeing discolored water coming from your taps can be alarming. Whether it’s brown, yellow, or even reddish, discolored water can raise concerns about safety and the condition of your plumbing. But don’t panic—there are several common reasons why this might happen, and many of them are not as serious as they appear. This article will guide you through the steps to identify the cause of the discoloration and what you should do to address it.
Understanding the Causes of Discolored Water
Rust and Corrosion
One of the most common causes of discolored water is rust. Rust can develop in your pipes, especially if you have older plumbing, and can cause water to take on a brownish or reddish hue. This rust might come from the water mains if they’re being flushed or repaired, or from your own pipes if they’re corroding.
Disturbance in the Water Supply
Discoloration can also occur if there’s been a disturbance in the water supply, such as nearby construction, repairs on water mains, or hydrant flushing. These activities can stir up sediment that normally sits harmlessly at the bottom of water pipes, causing temporary discoloration.
Mineral Deposits
If you notice yellow or brown water, mineral deposits like iron and manganese might be the culprit. These minerals can accumulate in your water supply, particularly if you have hard water. While these minerals are not harmful, they can affect the appearance and taste of your water.
Algae Growth
In rare cases, greenish or bluish water may indicate algae growth, particularly in homes that use well water. Algae can enter the water supply and cause discoloration, although this is more common in untreated water sources.
Issues with Your Water Heater
If the discoloration occurs only in hot water, your water heater might be the source. Sediment buildup in the tank can cause brown or rust-colored water, particularly if the heater hasn’t been serviced in a while.
Steps to Take When Your Water Is Discolored
Step 1: Identify the Source
The first step is to determine whether the discoloration is affecting your entire home or just a single faucet. Check multiple taps to see if the issue is widespread. Also, check whether the discoloration occurs with both hot and cold water or just one of them.
Step 2: Run the Cold Water
If the discoloration is in all taps, try running the cold water for a few minutes. Sometimes, this can flush out the sediment or rust causing the discoloration. If the water clears after a few minutes, the problem was likely temporary.
Step 3: Avoid Using Hot Water
If you notice the discoloration only in your hot water, avoid using hot water until the issue is resolved. Running discolored hot water through your pipes can spread the sediment or rust throughout your plumbing system, potentially leading to further issues.
Step 4: Check with Your Water Supplier
If the discoloration persists, contact your water supplier to see if there have been any recent repairs or disturbances in the water supply. They can provide information on whether the issue is temporary and when you can expect it to clear up.
Step 5: Inspect Your Water Heater
If the problem is with your hot water, inspect your water heater. Draining and flushing the tank can remove sediment buildup that might be causing the discoloration. If you’re unsure how to do this, it might be best to contact a professional plumber.
Step 6: Consider a Water Test
If the discoloration persists and you’re concerned about the safety of your water, consider having it tested. A water test can identify any contaminants or harmful substances in your water and help you determine the best course of action.
Preventing Future Discoloration
Regular Plumbing Maintenance
One of the best ways to prevent discolored water is through regular plumbing maintenance. Inspect your pipes for signs of corrosion, and if your plumbing is old, consider replacing it with newer materials that are less prone to rust.
Flush Your Water Heater Annually
Flushing your water heater at least once a year can prevent sediment buildup that leads to discolored hot water. This simple maintenance task can extend the life of your water heater and ensure the quality of your hot water.
Use a Water Softener
If you live in an area with hard water, installing a water softener can help reduce the mineral deposits that cause discoloration. Water softeners remove excess minerals from your water, preventing them from accumulating in your pipes and appliances.
Install a Whole-House Water Filter
For added protection, consider installing a whole-house water filter. These filters can remove sediment, rust, and other contaminants from your water supply before it reaches your taps, ensuring clean, clear water throughout your home.
Discolored water can be unsettling, but it’s usually not a cause for immediate concern. By identifying the source of the discoloration and taking the appropriate steps, you can address the issue and restore your water to its normal clarity. Regular maintenance and preventative measures can also help you avoid future occurrences of discolored water, ensuring that your home’s water supply remains safe and clean.
FAQs
Is discolored water safe to drink?
Discolored water is often caused by rust or mineral deposits, which are generally not harmful. However, it’s best to avoid drinking discolored water until the issue is resolved and the water is clear again. If you’re unsure, consider having your water tested for safety.
What should I do if the discoloration persists?
If the discoloration continues after flushing the water and checking with your water supplier, it may be due to an issue with your plumbing or water heater. You should consider contacting a professional plumber to inspect your system.
Can discolored water damage my plumbing or appliances?
Yes, prolonged exposure to rust, sediment, or minerals in discolored water can cause damage to your pipes and appliances, leading to potential clogs, corrosion, and reduced efficiency. Addressing the issue promptly can help prevent long-term damage.
Why does my water turn brown when I run hot water but not cold water?
Brown hot water often indicates sediment buildup in your water heater. Flushing your water heater can usually resolve this issue. If the problem persists, you may need to have your water heater inspected by a professional.
How can I prevent water discoloration in the future?
Regular plumbing maintenance, flushing your water heater annually, installing a water softener if you have hard water, and using a whole-house water filter can all help prevent future occurrences of discolored water in your home.